Providers
When deploying Kerberos Agents you have the possibility to Bring Your Own Storage; at the edge or in the cloud. By configuring Kerberos Vault you persist your recordings in your preferred storage providers. Following providers are supported:
Kerberos Vault allows you to attach one or more (and different) storage providers. Depending on the use case: Kerberos Vault in a cloud environment or at the edge, you will opt for a specific storage provider. For example in the case of a Kerberos Vault installation at the edge, it makes more sense to store your recordings also at the edge, so you avoid cloud storage costs, have better latency, reduce expensive bandwidth.
Prerequisites
Before you can configure a provider, make sure you have installed a Kerberos Vault inside a Kubernetes cluster.
Configuration of a provider
Once you have set up your Kerberos Vault instance, and have successfully login to the application, you should see the provider navigation item on the left.
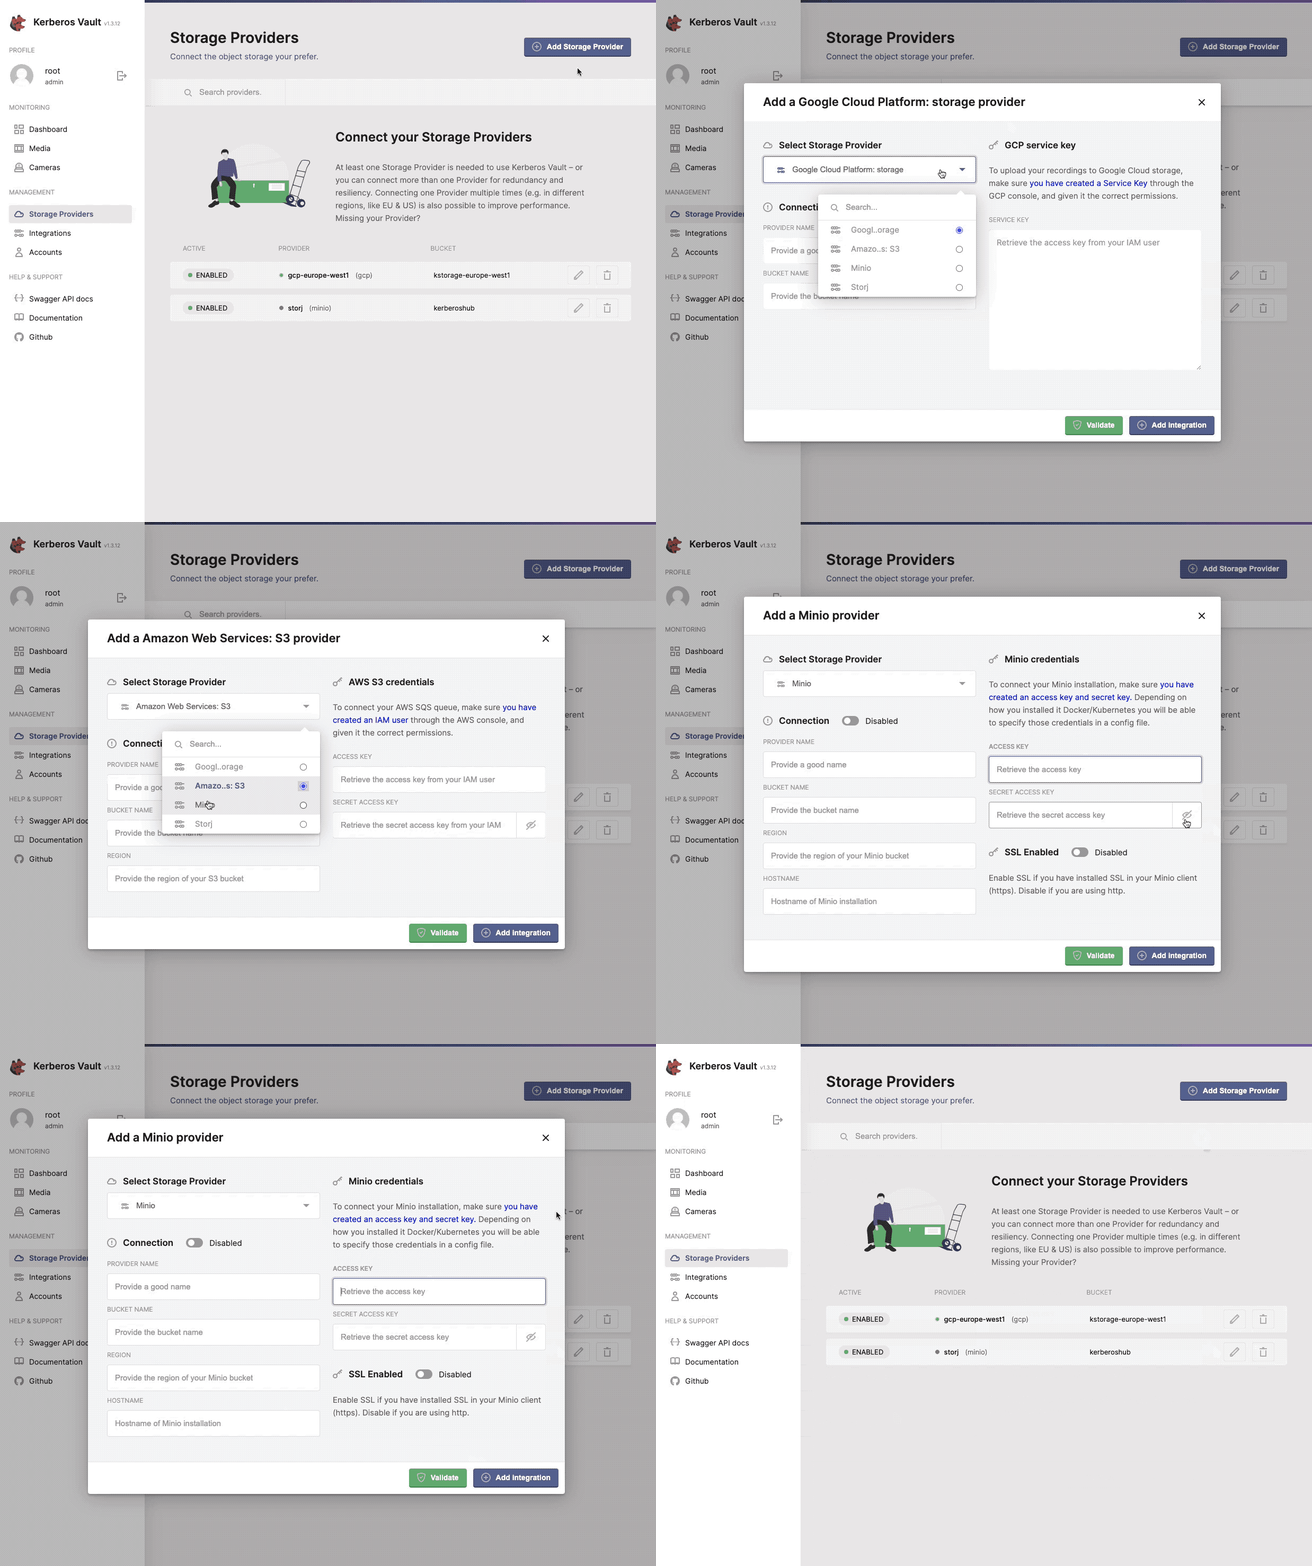
One or more providers can be configured to centralise your storage.
When selecting the + Add Storage Provider button, a modal will open that allows you to configure a specific storage provider. Go a head and select one from the list.
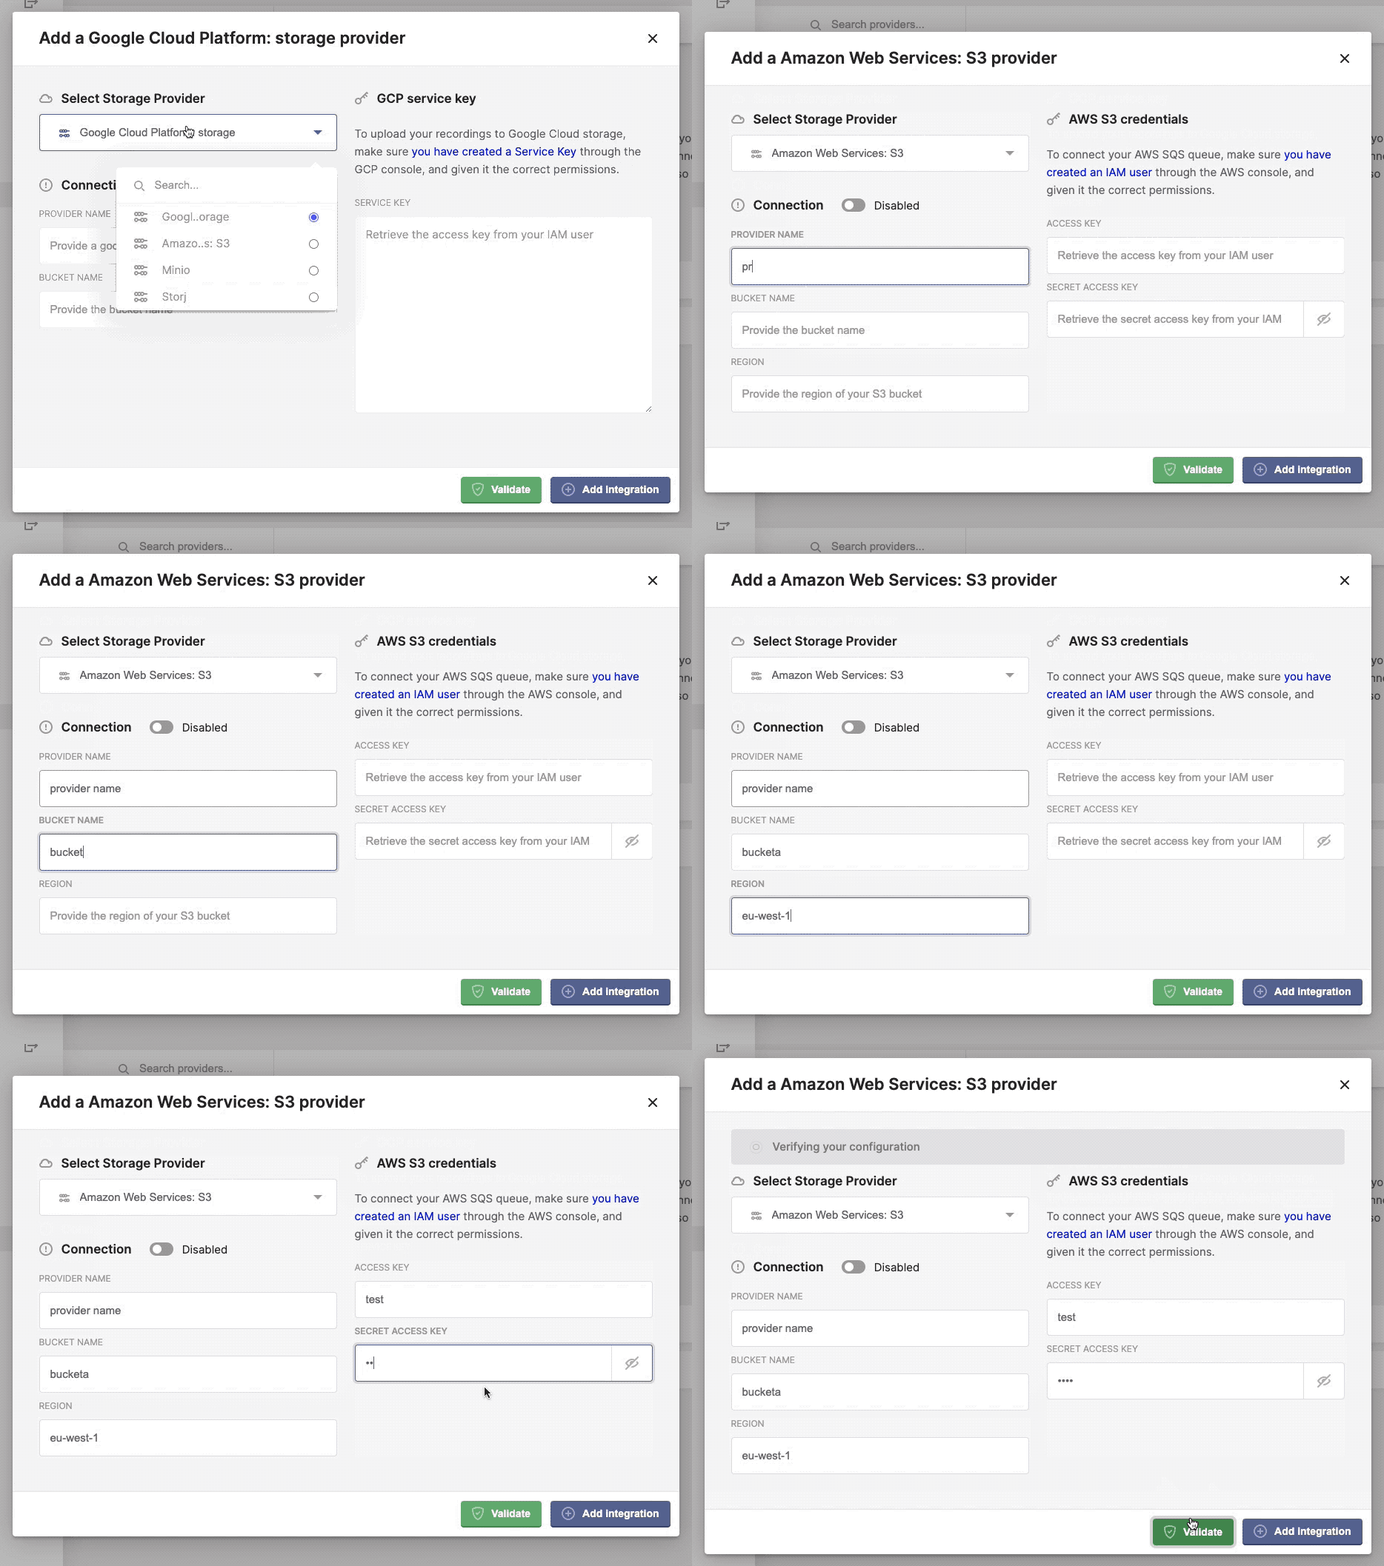
Configure, add and validate a new storage provider.
Once completed the necessary credentials, specific to your storage provider, you can verify the connection by click the Validate button. If ok, it should return a green confirmation box, if something went wrong you should see the relevant error message in a red alert box.
Once configured you can add multiple and different providers. Have some fun.
Cloud storage providers
Kerberos Vault integrates with storage providers in the cloud such as AWS S3, GCP Storage and Storj. The advantage of previously mentioned storage providers, is that the take complete control of your every growing storage requirements. They scale with your needs at a low TCO.
AWS S3
Tutorial to be written.
GCP Storage
Tutorial to be written.
Storj
Introduction
Storj DCS is the world’s first open-source, decentralized cloud storage layer that’s private by design and secure by default - enabling developers to build in the best data protection and privacy into their applications as possible. The zero trust architecture, multi-region high availability, default encryption and edge-based access controls minimize risk and give only you, or those you grant permission to, access to your files. The result is that you take back full ownership and control of your data.
The Storj DCS Satellite Admin Console supports uploading and managing objects directly through the browser with no command-line tool required. This component uses our hosted S3-compatible Gateway service.
Create an Account
To start using Storj, an account has to be created on the public Storj cloud application. Once you are signed up, you will go through the traditional on-boarding and verification flow.
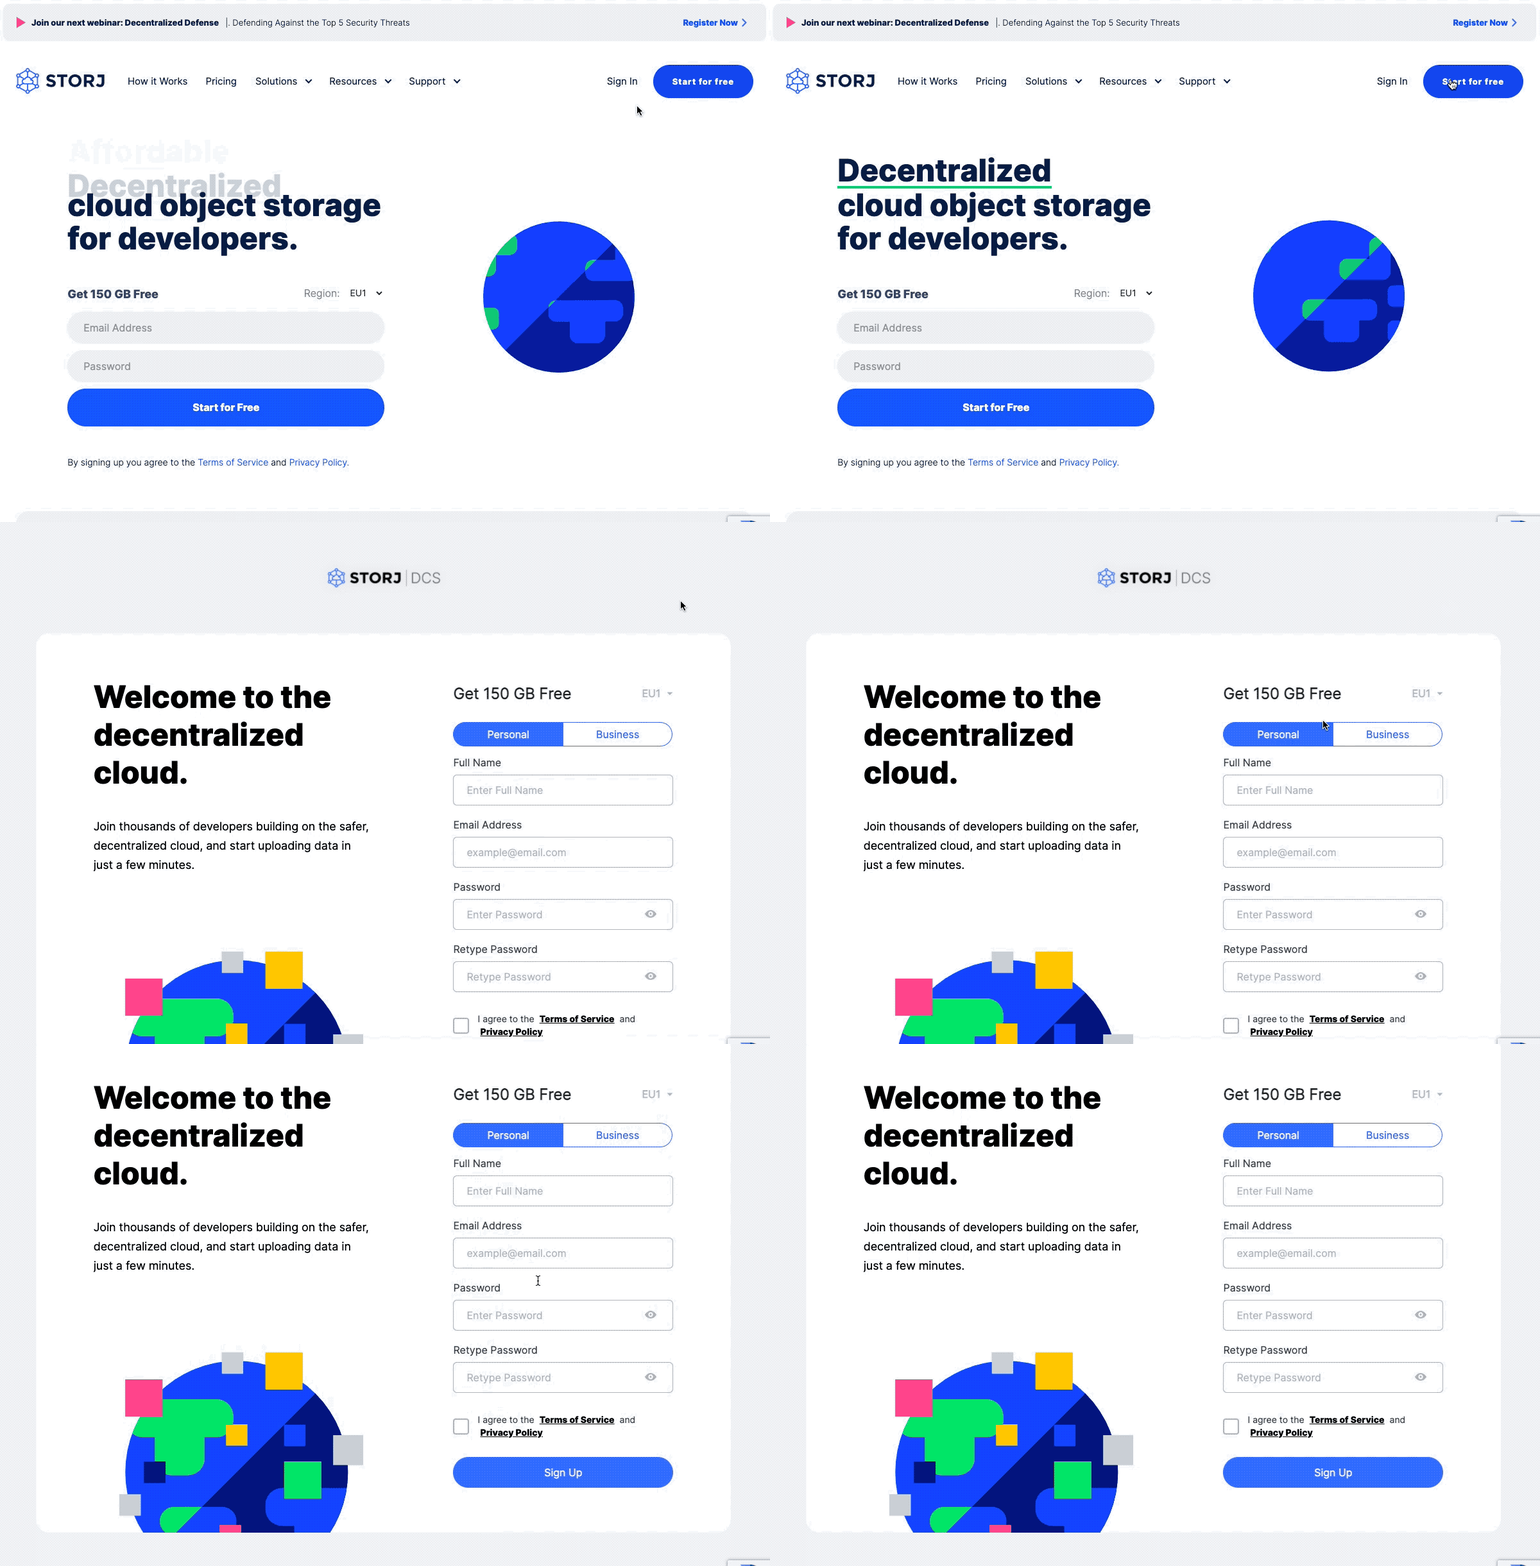
Create an account at Storj.io
Configure Object Browser Access
Once you activated your account, go ahead and sign in to your profile. The first time you’ve signed in you will be asked to create a Bucket. Select the Upload In Browser, and give a specific name to your Bucket.
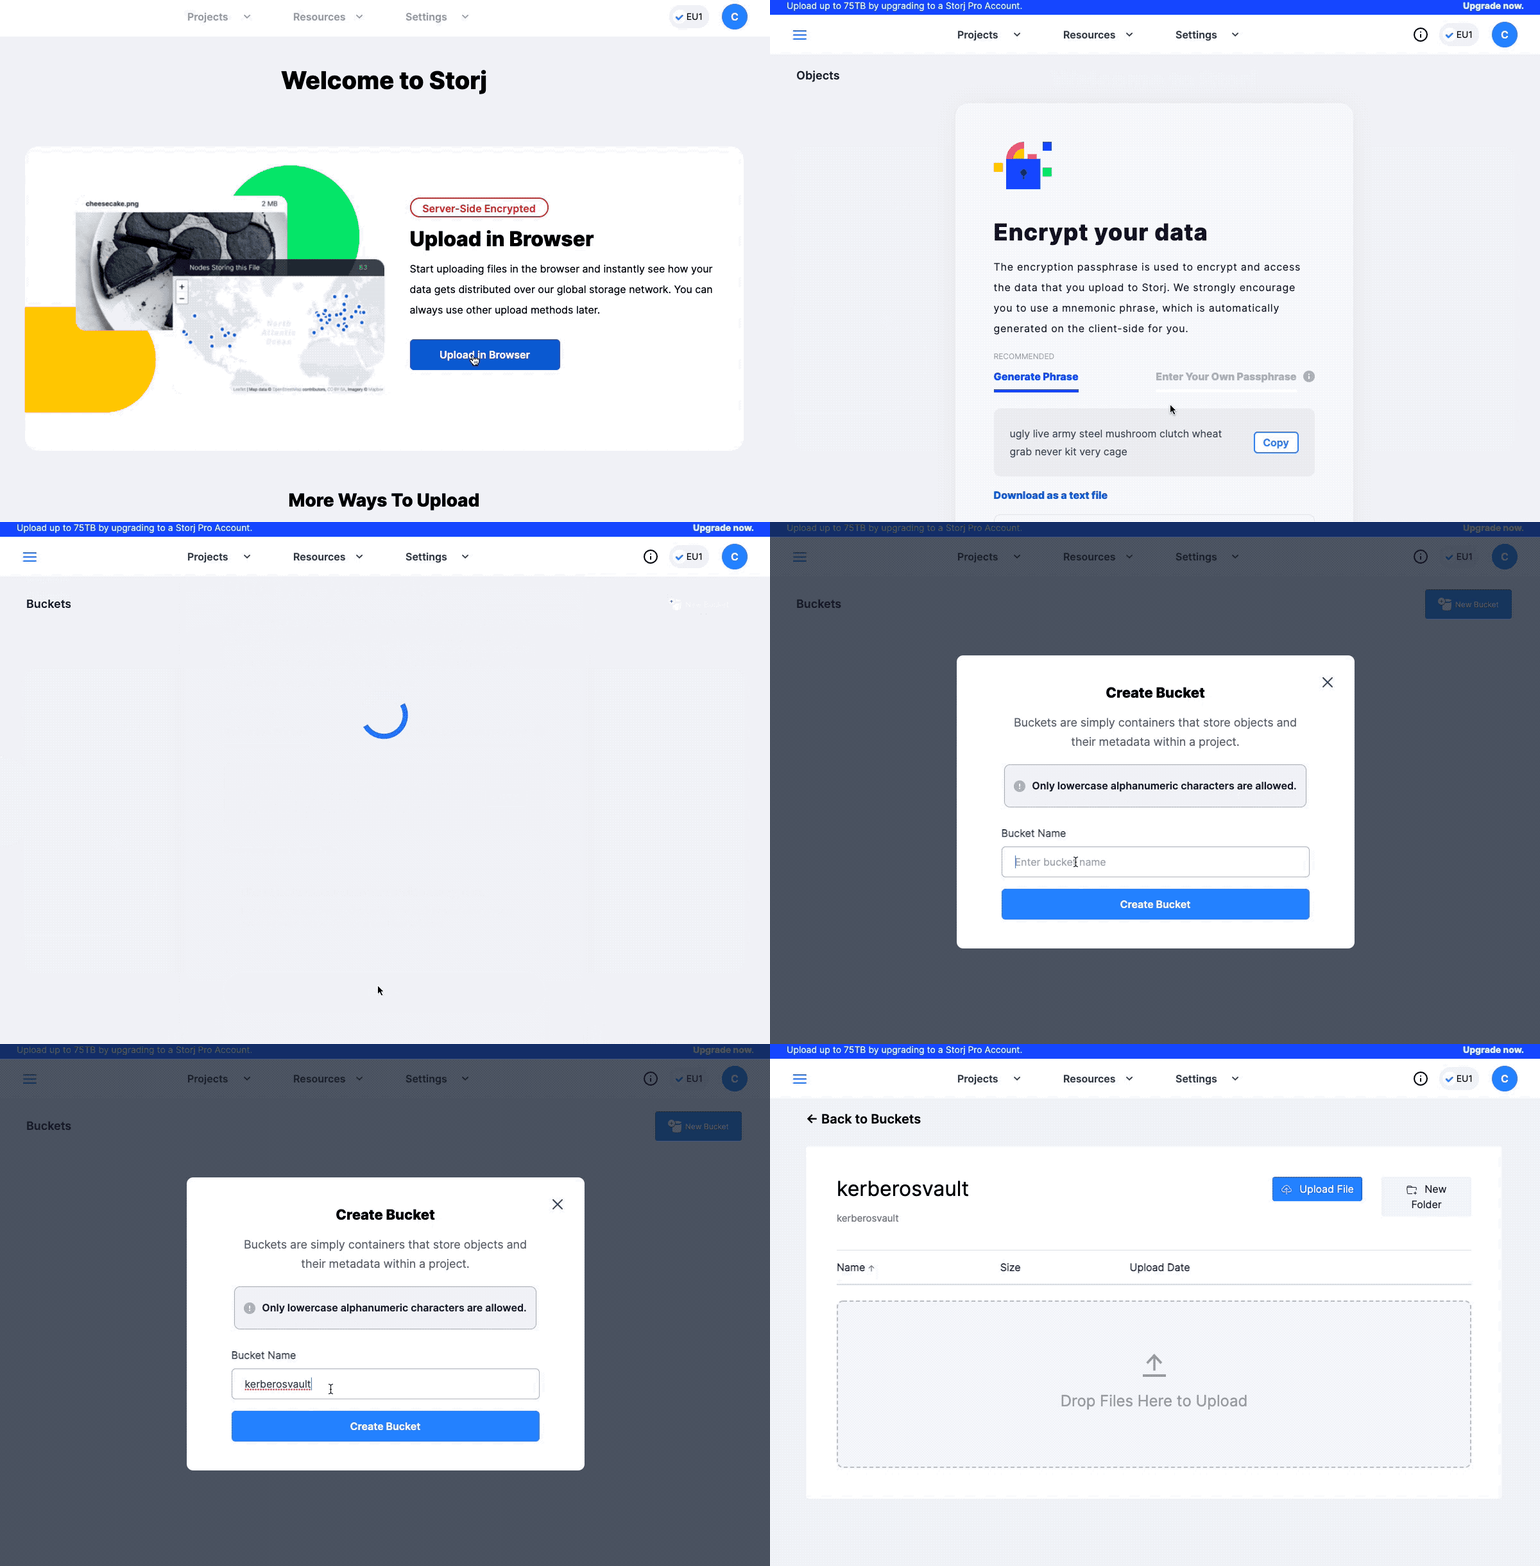
Create a Storj bucket.
Create Access Grant
So now we have created a Bucket, we will need to have credentials to interact with it. Go to the “Access” page, select the (Create Access Grant) button at the top. Provide the required fields, and select the option (Generate S3 Gateway Credentials).
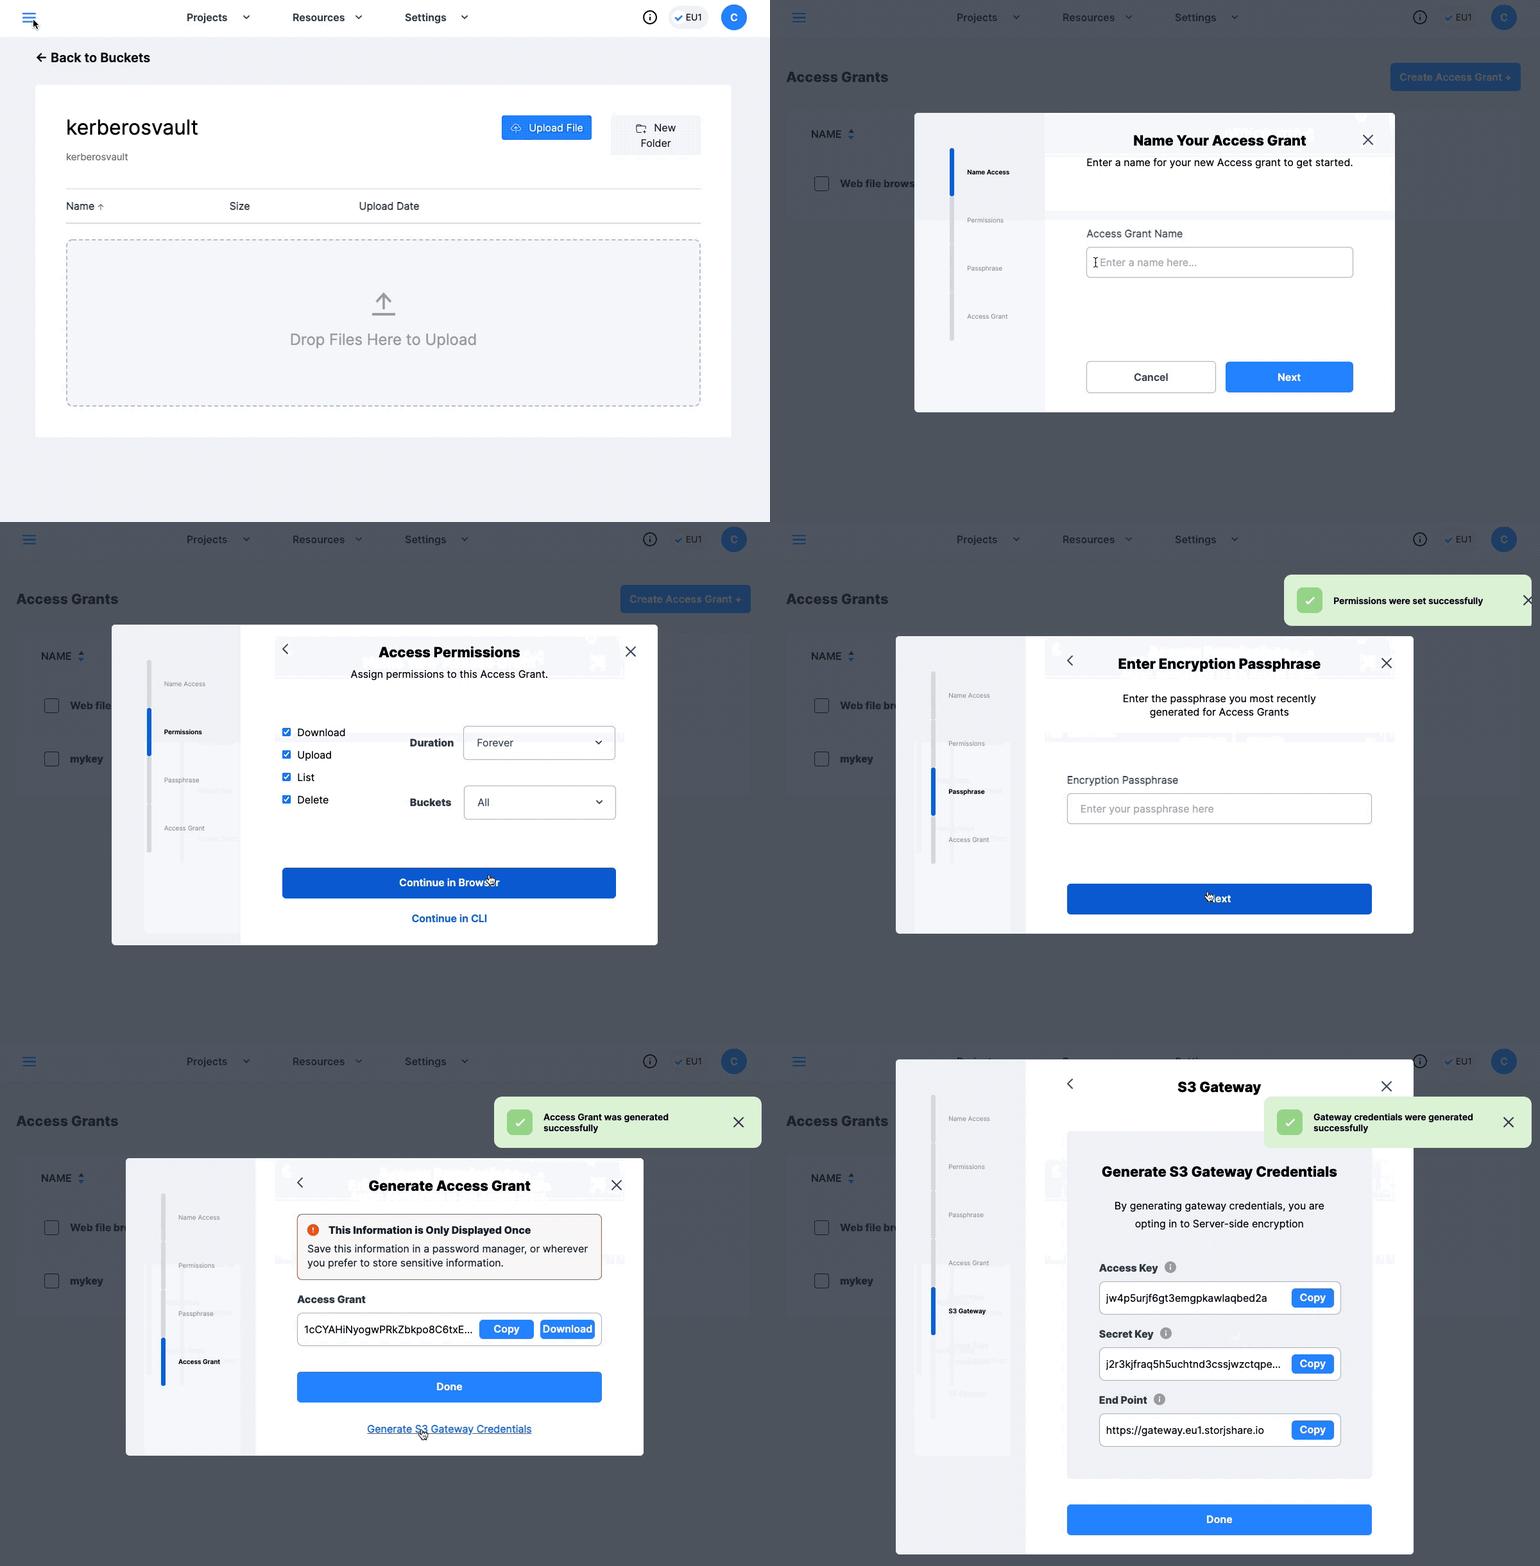
Create a Storj Access Grants.
Integrate
Now you are ready to assign Storj as a storage provider to Kerberos Vault. Open the Providers page of Kerberos Vault, and select the Storj provider.
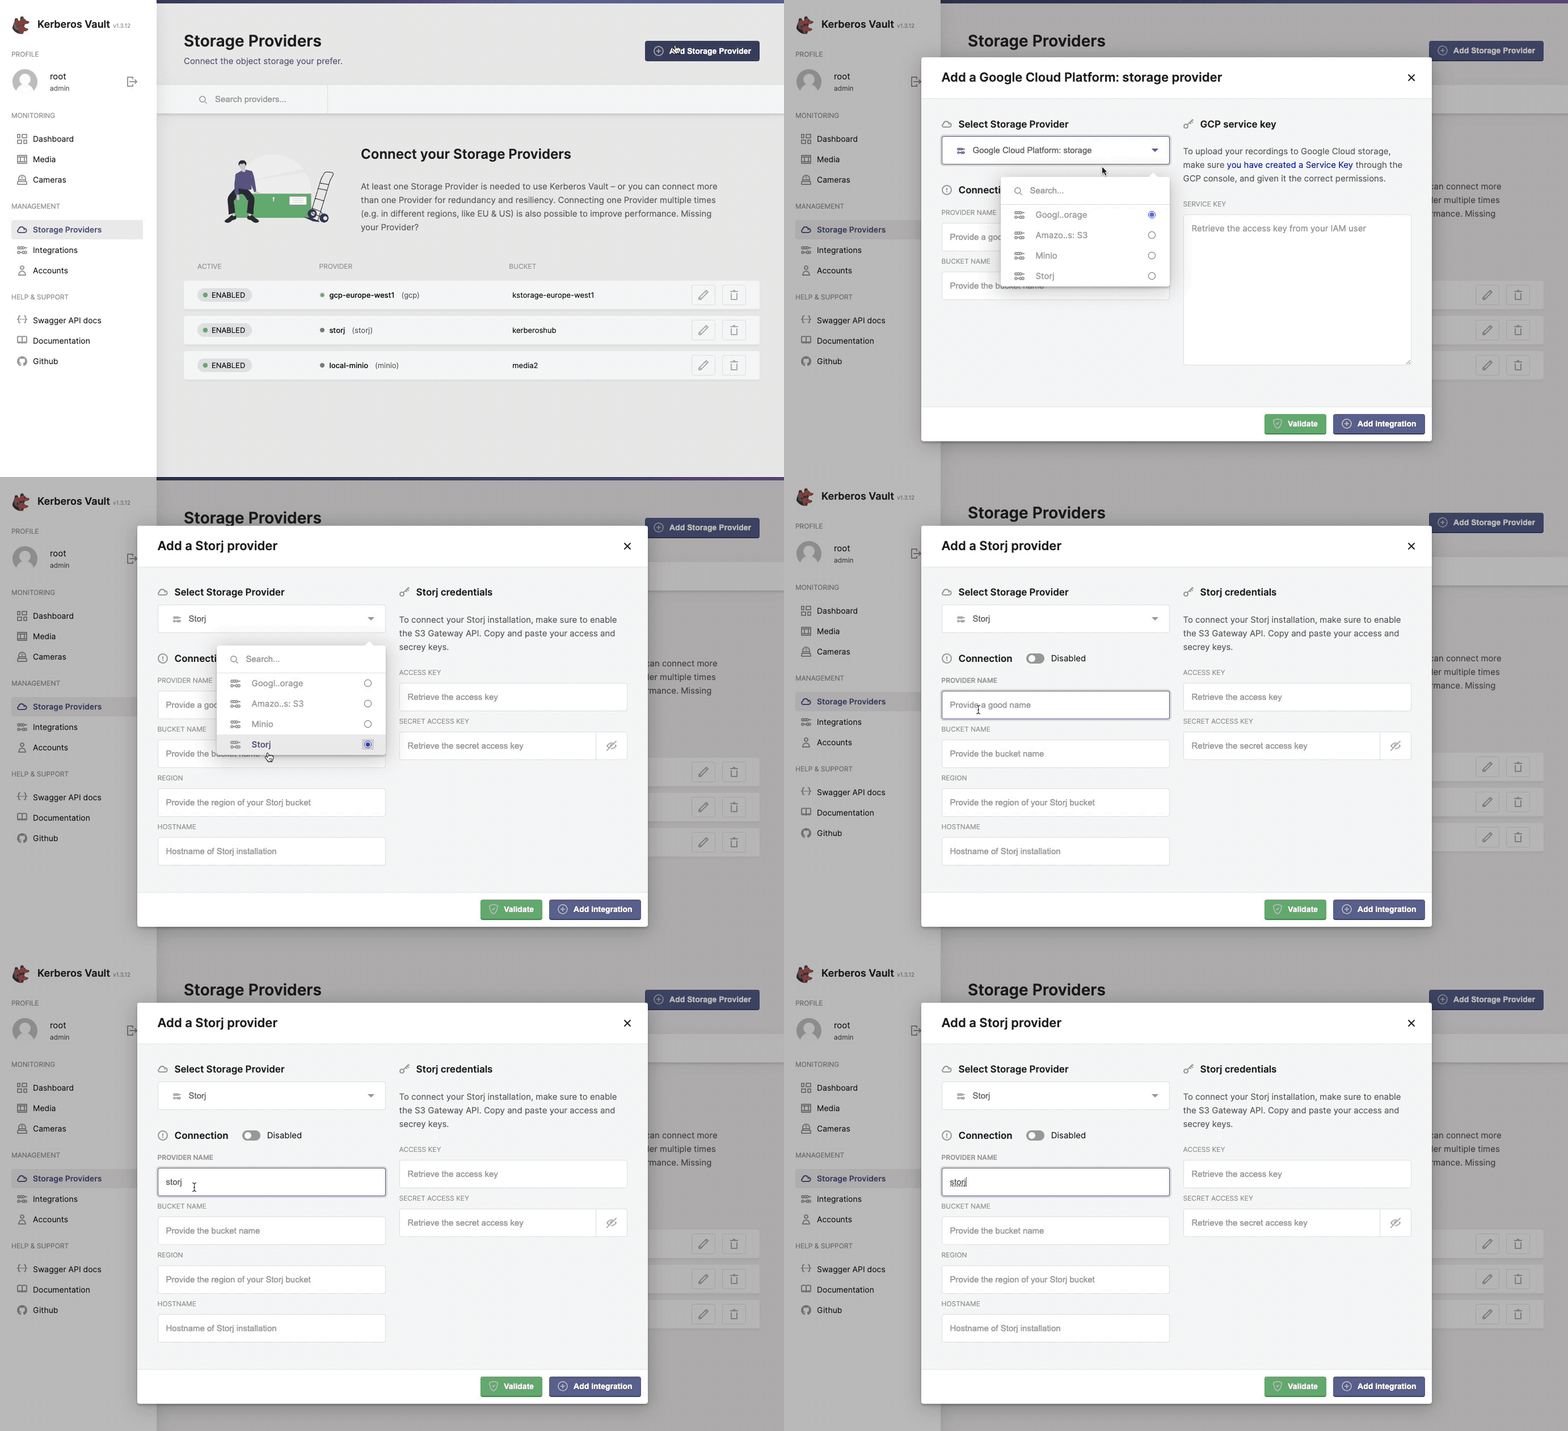
Integrate Storj.io with Kerberos Vault.
- Provider name: this a preferred name for the provider.
- Bucket name: the name of a bucket created in Storj, make sure this matches.
- Region: this is not relevant for an edge deployment and can be left blank.
- Hostname: this is the DNS name for the Storj Gateway and relevant region, for example: gateway.eu1.storjshare.io.
- Access Key: the
access keyyou’ve received when generating the S3 Gateway credentials. - Secret Access Key: the
secret keyyou’ve received when generating the S3 Gateway credentials.
Edge storage providers
Kerberos Vault also integrates with storage providers that are more suitable for edge deployments. Examples are Minio and Ceph, these are storage providers that you can install wherever you want. Therefore, they are interesting when considering edge computing to reduce latency, cloud billing and bandwidth. Examples are machine learning use cases, to trigger events or limit the transfer to a cloud storage.
Minio
Minio is a recommended solution if you would like to persist your recordings at the edge. To set up Minio you have to configure a few Kubernetes resources. To simplify the installation, we will go ahead with the Minio operator.
The Minio operator can be used to set up a production ready Minio cluster, with multiple nodes and drives. Using the concept of Minio tenants you can scale your Minio cluster easily.
kubectl krew update
kubectl krew install minio
To install krew in your kubectl toolkit, following the offical documentation.
kubectl minio version
kubectl minio init
Run the following command to verify the status of the Operator:
kubectl get pods -n minio-operator
Run the following command to create a local proxy to the MinIO Operator Console:
kubectl minio proxy -n minio-operator
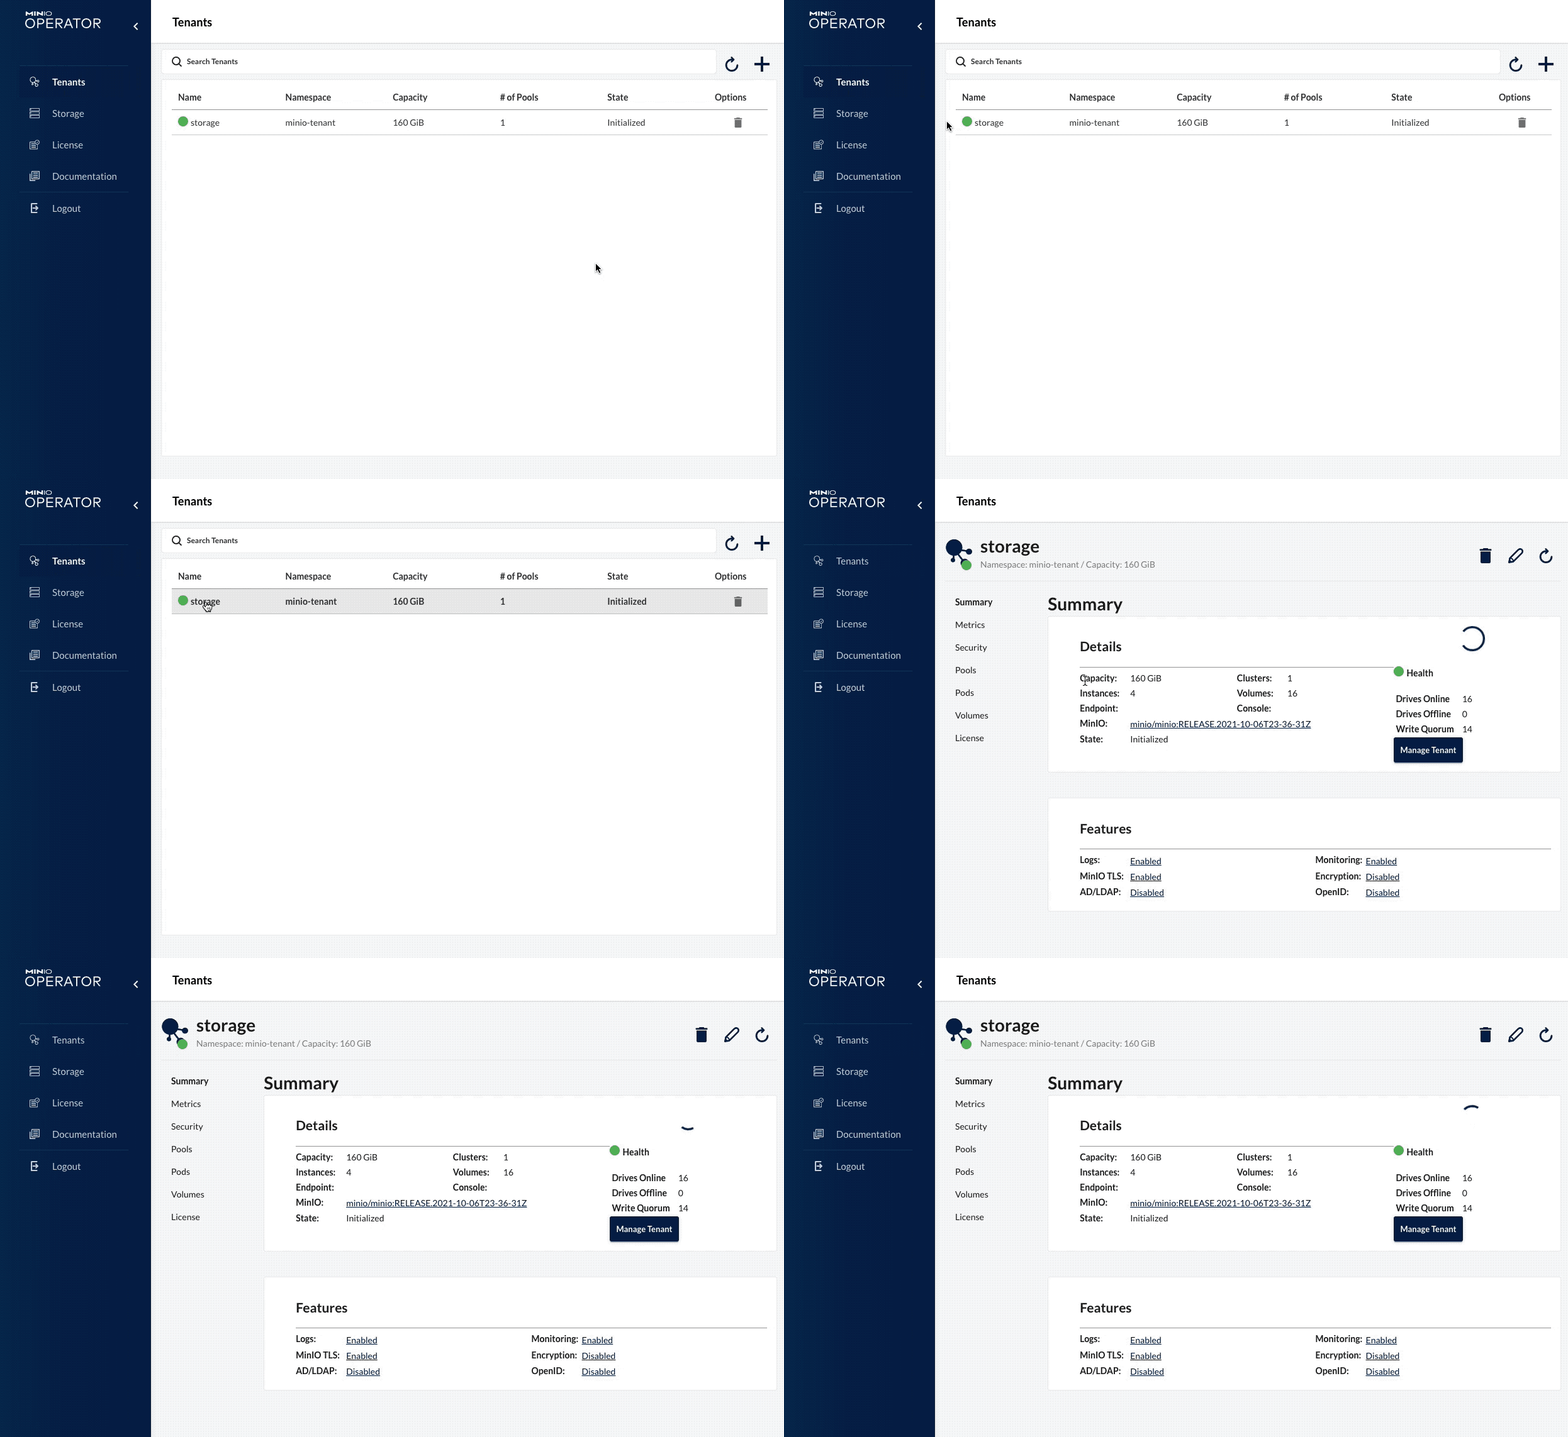
Open the MinIO Operator Console, where your tenants are managed.
Once you have the Console open, you can go ahead and create/configure a MinIO tenant. To simplify the creation of a tenant we will apply following manifests, this will create a tenant for us with the proper configuration; feel free to tweak this to your own needs (testing/production).
In the below manifests we have been using the OpenEBS storage class for local-storage. Please note that you can use whatever storage provider you like, make sure you change the relevant configuration files.
kubectl apply -f https://openebs.github.io/charts/openebs-operator.yaml
Once you have selected your storage class, or installed OpenEBS, go ahead by applying the different manifests. Below configuration will deploy a single server, with 4 volumes of 10Gb. It will also create a default access key (minio) and secret key (minio123).
git clone https://github.com/kerberos-io/vault && cd kubernetes/minio
kubectl create namespace minio-tenant
kubectl apply -f minio.cred.yaml
kubectl apply -f minio.config.tenant.yaml
kubectl apply -f minio.tenant.yaml
Once applied the MinIO tenant will be created, and you should see some pods being created in the minio-tenant namespace. Once everything is ready you should be able to access to MinIO Tenant console by forwarding the service.
kubectl get svc -n minio-tenant
kubectl port-forward svc/minio-console 9090 -n minio-tenant
While accessing the console, you can create a new Bucket.
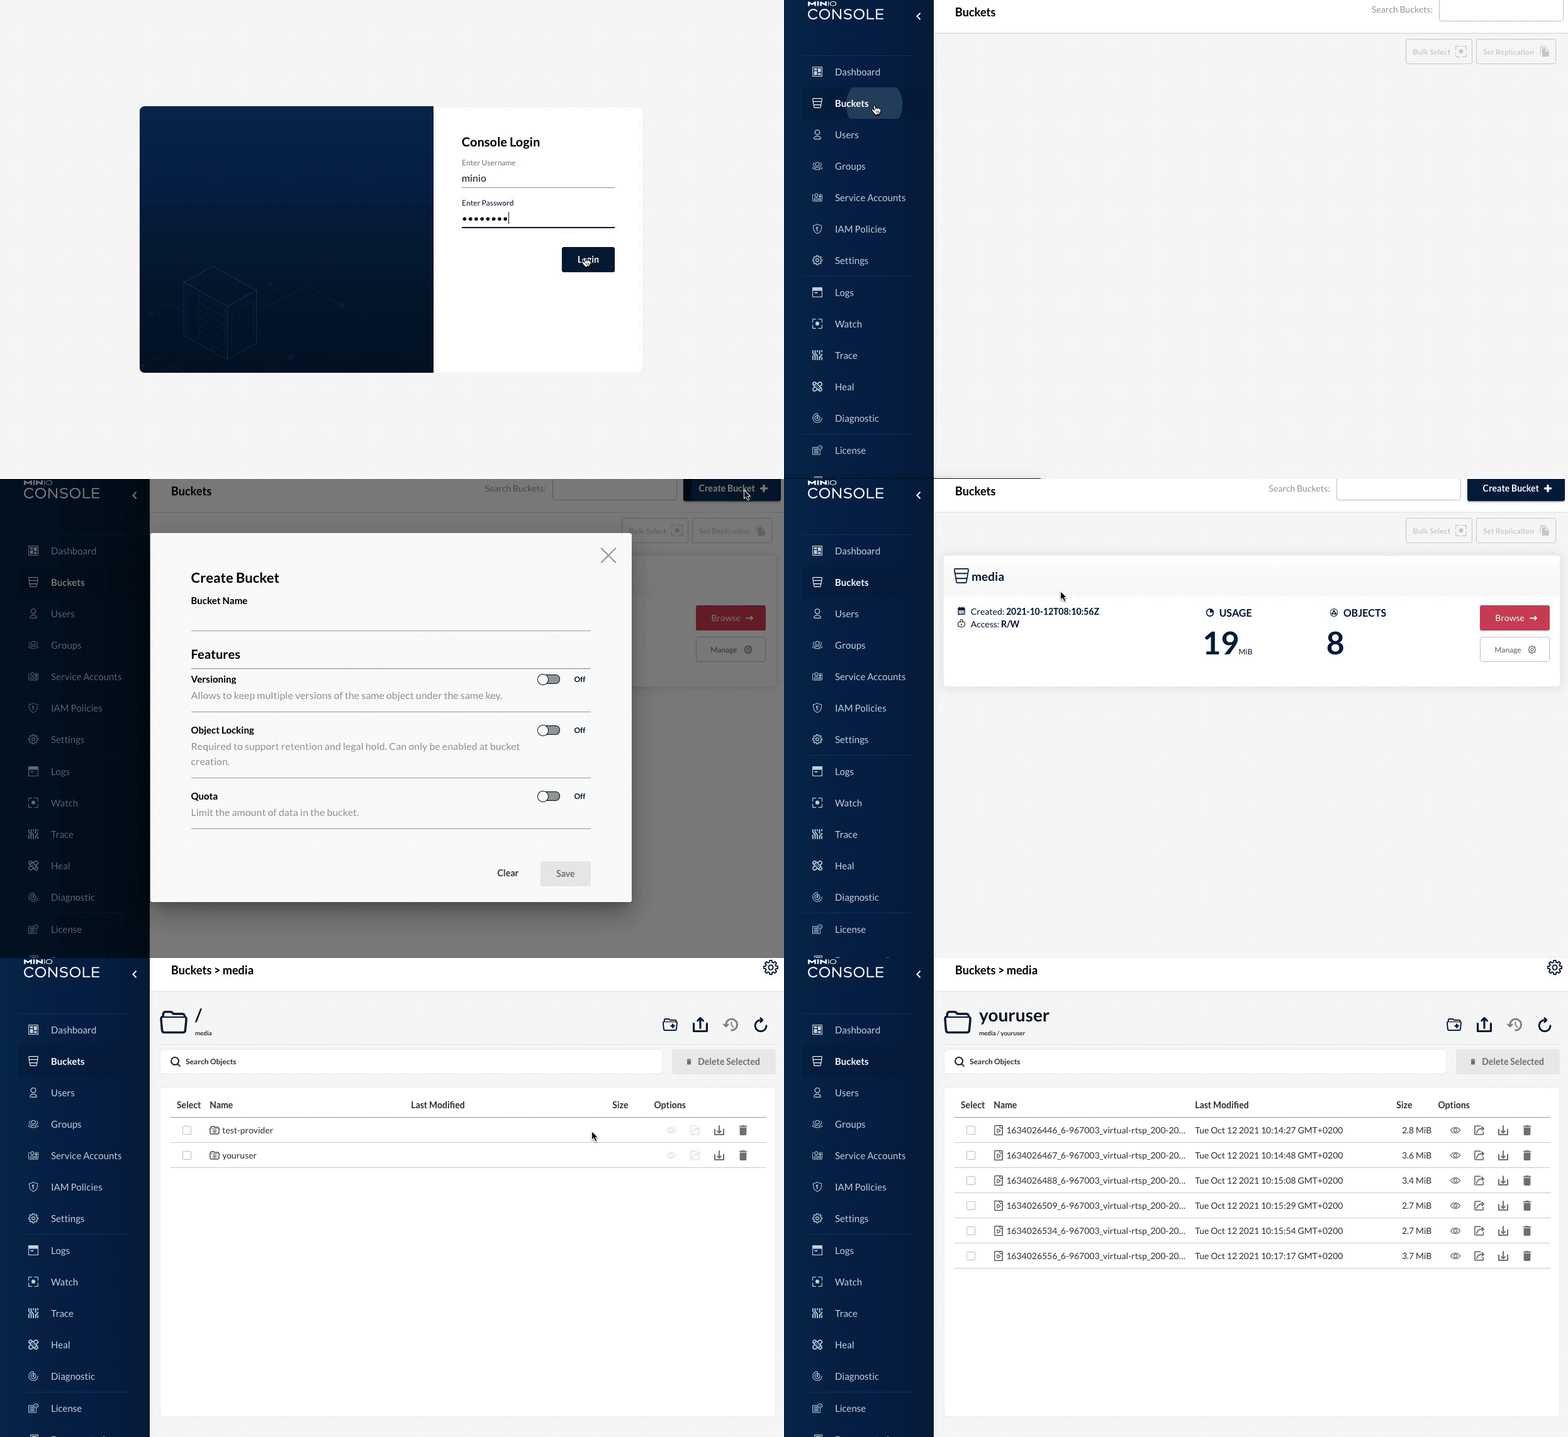
Create a bucket in Minio.
Integrate
Now you are ready to assign Minio as a storage provider to Kerberos Vault. Open the Providers page of Kerberos Vault, and select the Minio provider.
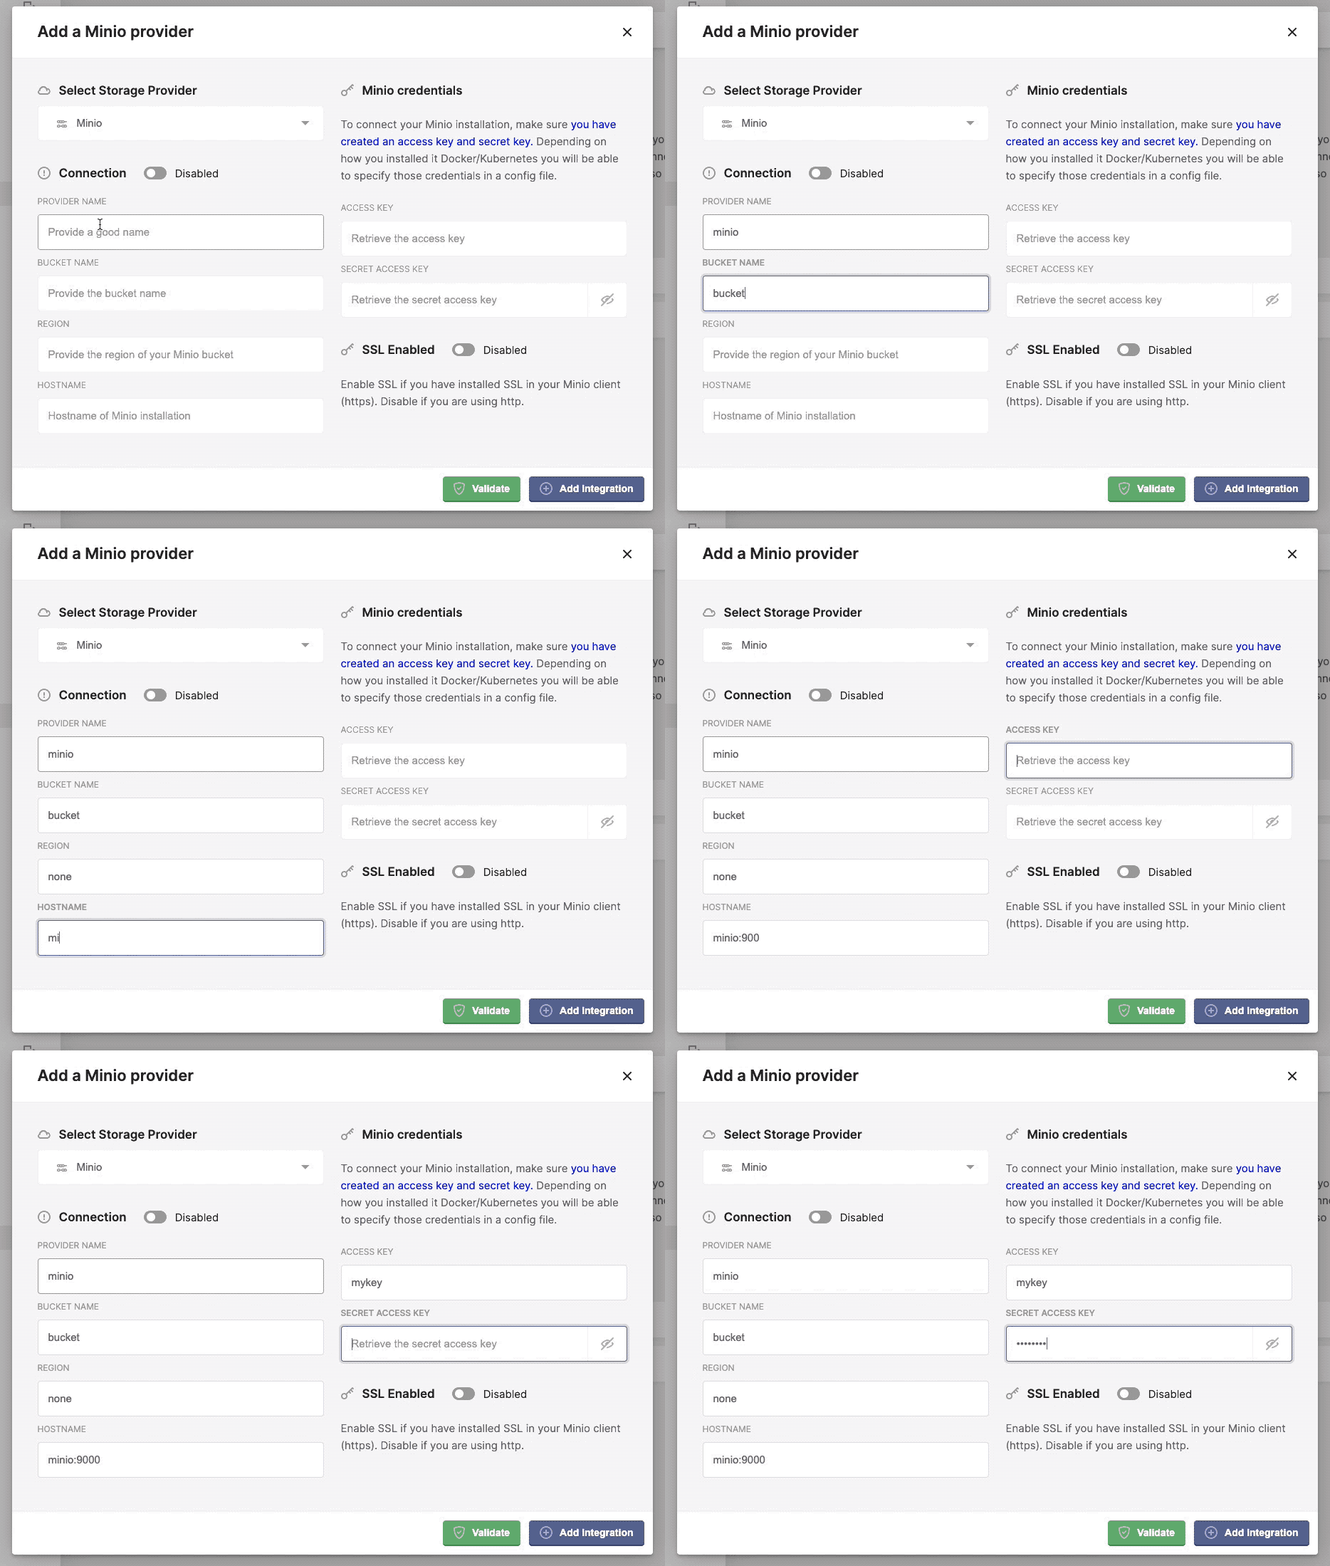
Configuring the minio provider in Kerberos Vault.
- Provider name: this a preferred name for the provider.
- Bucket name: the name of a bucket created in minio, make sure this matches.
- Region: this is not relevant for an edge deployment and can be left blank.
- Hostname: this is the internal DNS name if the Minio instance, for example: minio.minio-tenant.
- Access Key: the
access keyyou’ve defined in theminio.config.tenant.yamlfile - Secret Access Key: the
secret keyyou’ve defined in theminio.config.tenant.yamlfile
If you needed more information about the Minio configuration, please have a look at the official MinIO operator Github page..
Ceph
Tutorial to be written.
 Kerberos Docs