Getting Started
What to expect from Kerberos Factory
Once you’ve installed Kerberos Factory, you will have the web application running inside your cluster. This web application allows you to administrate and automate the creation of your Kerberos Agents through the concept of Kubernetes deployments and pods.
Important to note is that this web application is relying on the official Golang Kubernetes API, so that means from an administration point of view, you could simply use the well known kubectl command instead. The web application adds some functionalities on top of the Kubernetes API, which are specific to a Kerberos Agent; for example region of interests, livestreaming settings, etc.
Login page
Once you open a browser, and navigate to the web application (see installation for the url), you will land on the login page.
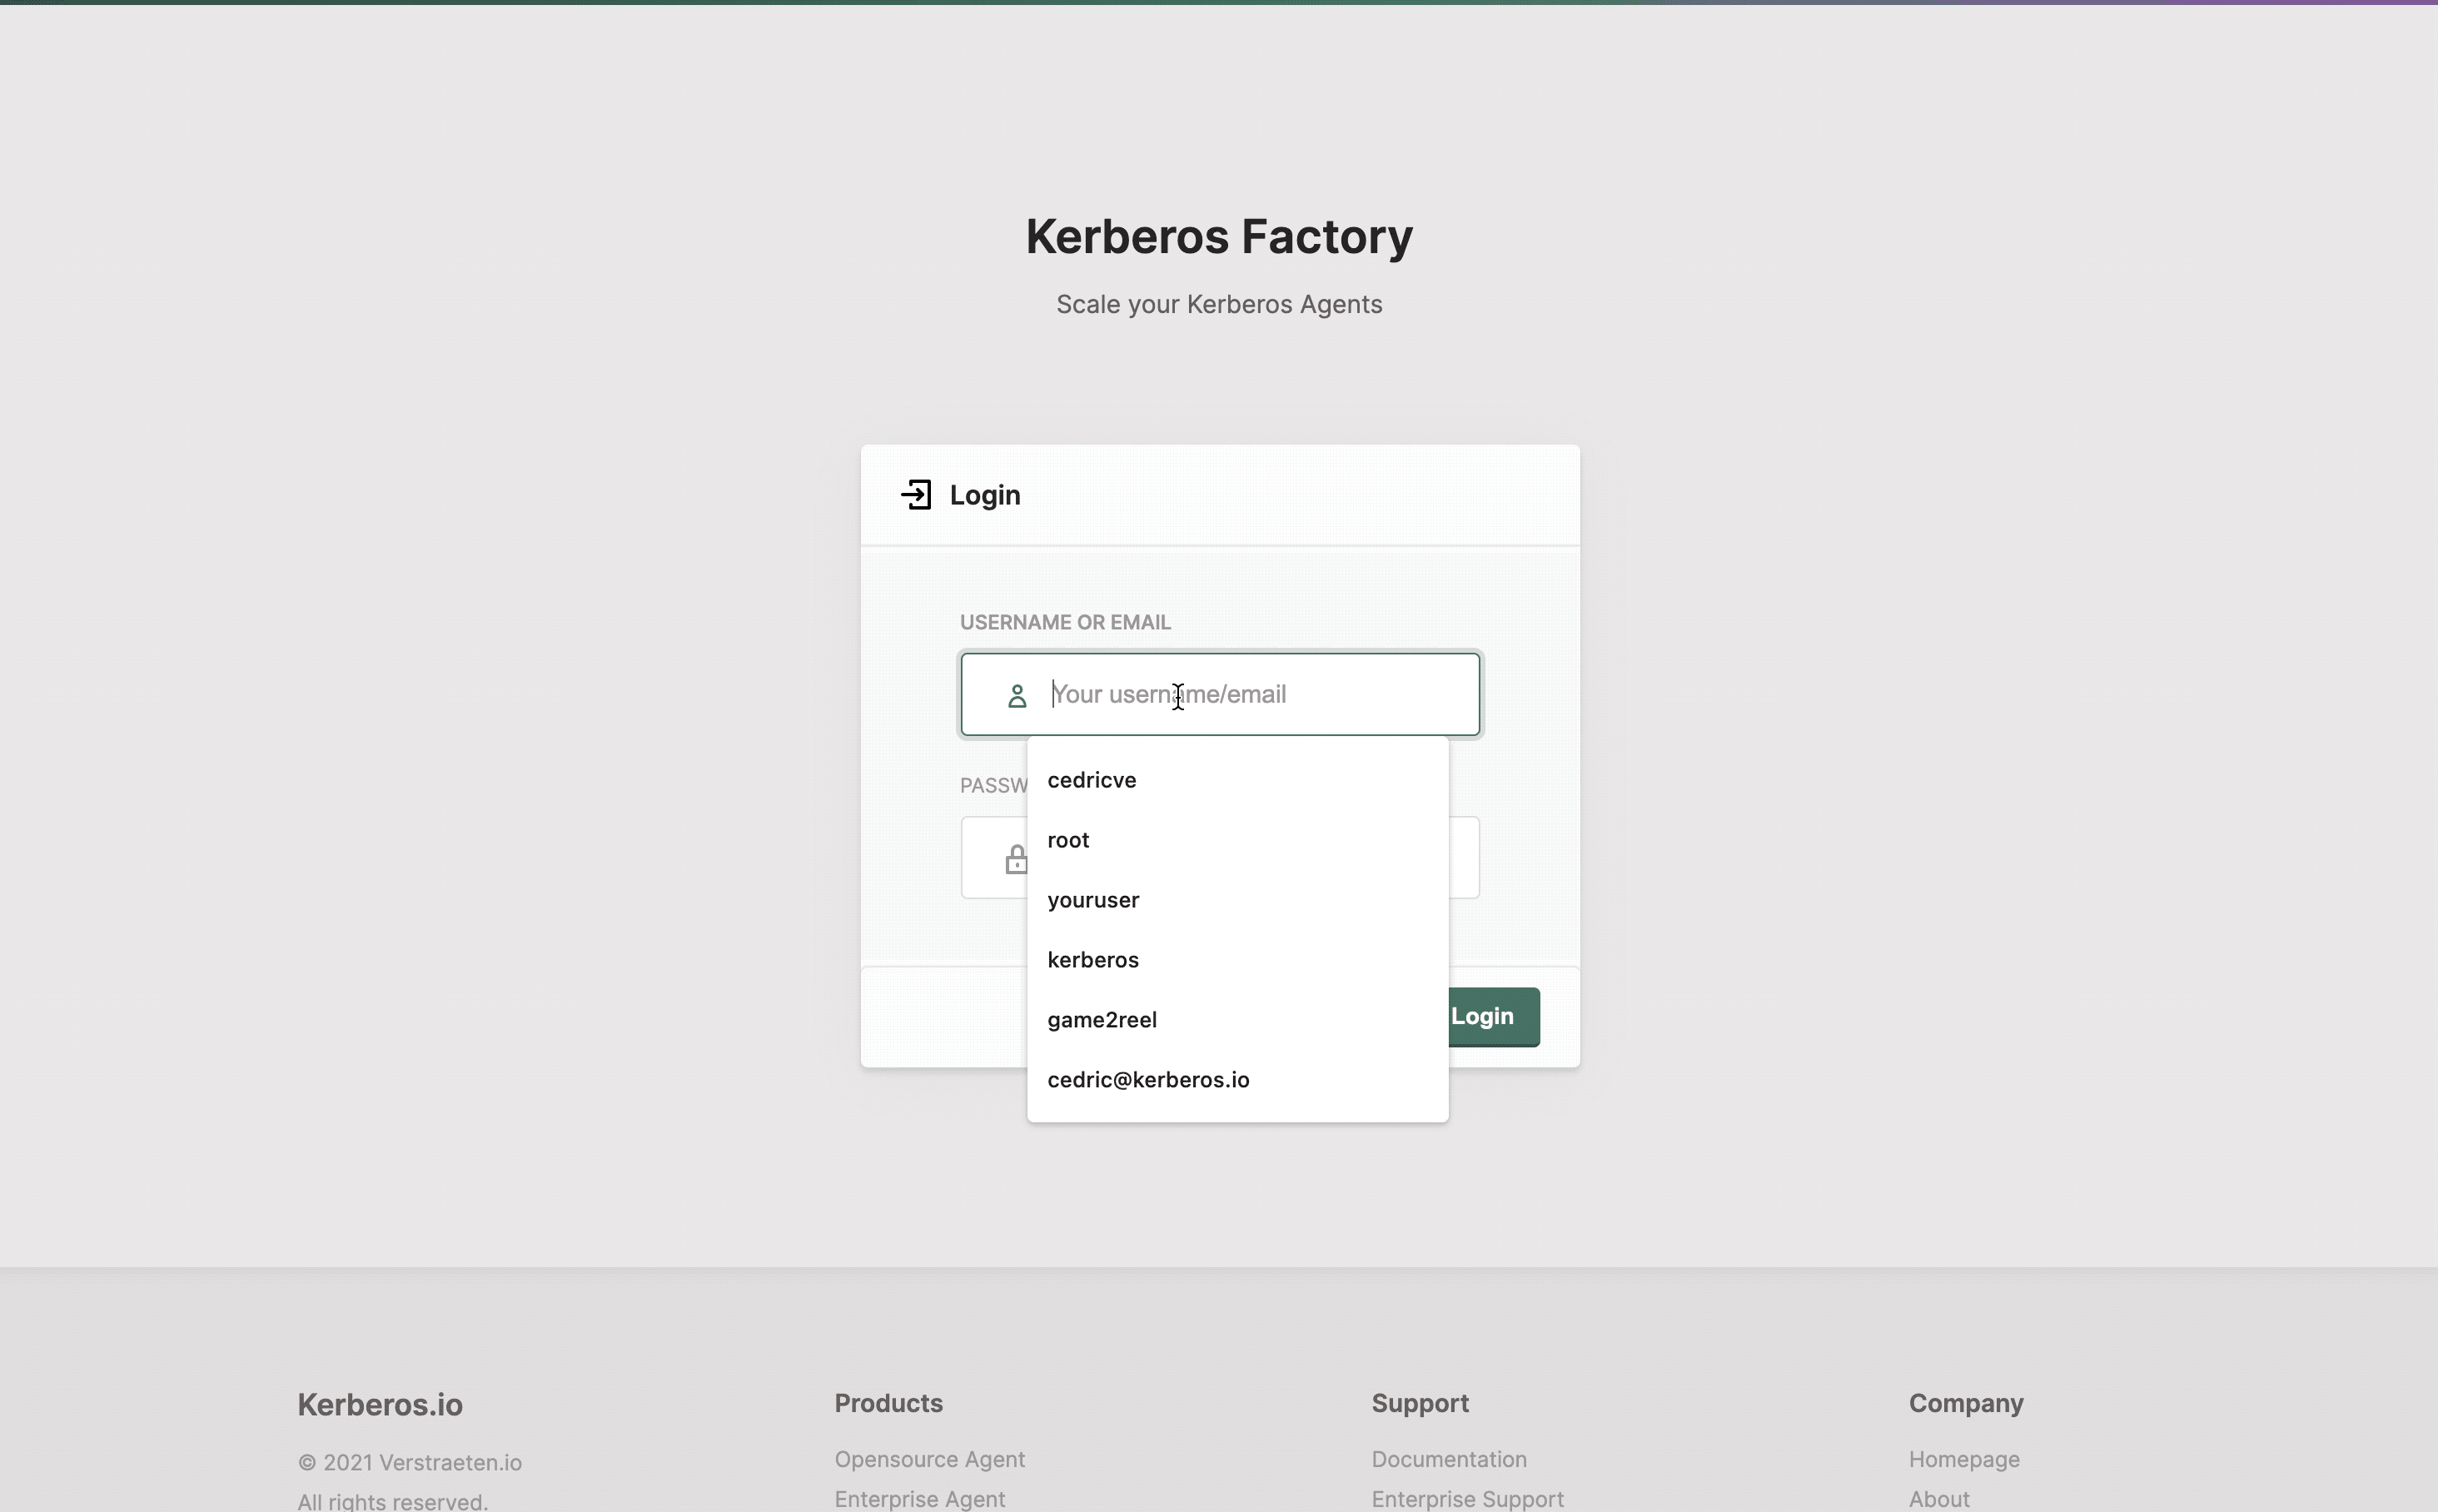
Login into the Kerberos Factory interface.
The default username password, specified in the deployment.yaml is:
- username: root
- password: kerberos
The username and password can be changed in the
deployment.yamlfile.
Overview
On the overview page you will find an intuitive overview of the different pages and functionalities. As Kerberos Factory is running on top of a Kubernetes cluster, Kerberos Agents are deployed as Kubernetes deployments.
Kerberos Factory allows you to inspect and configure your Kerberos Agents, but also provide an overview of the Kubernetes nodes and pods.
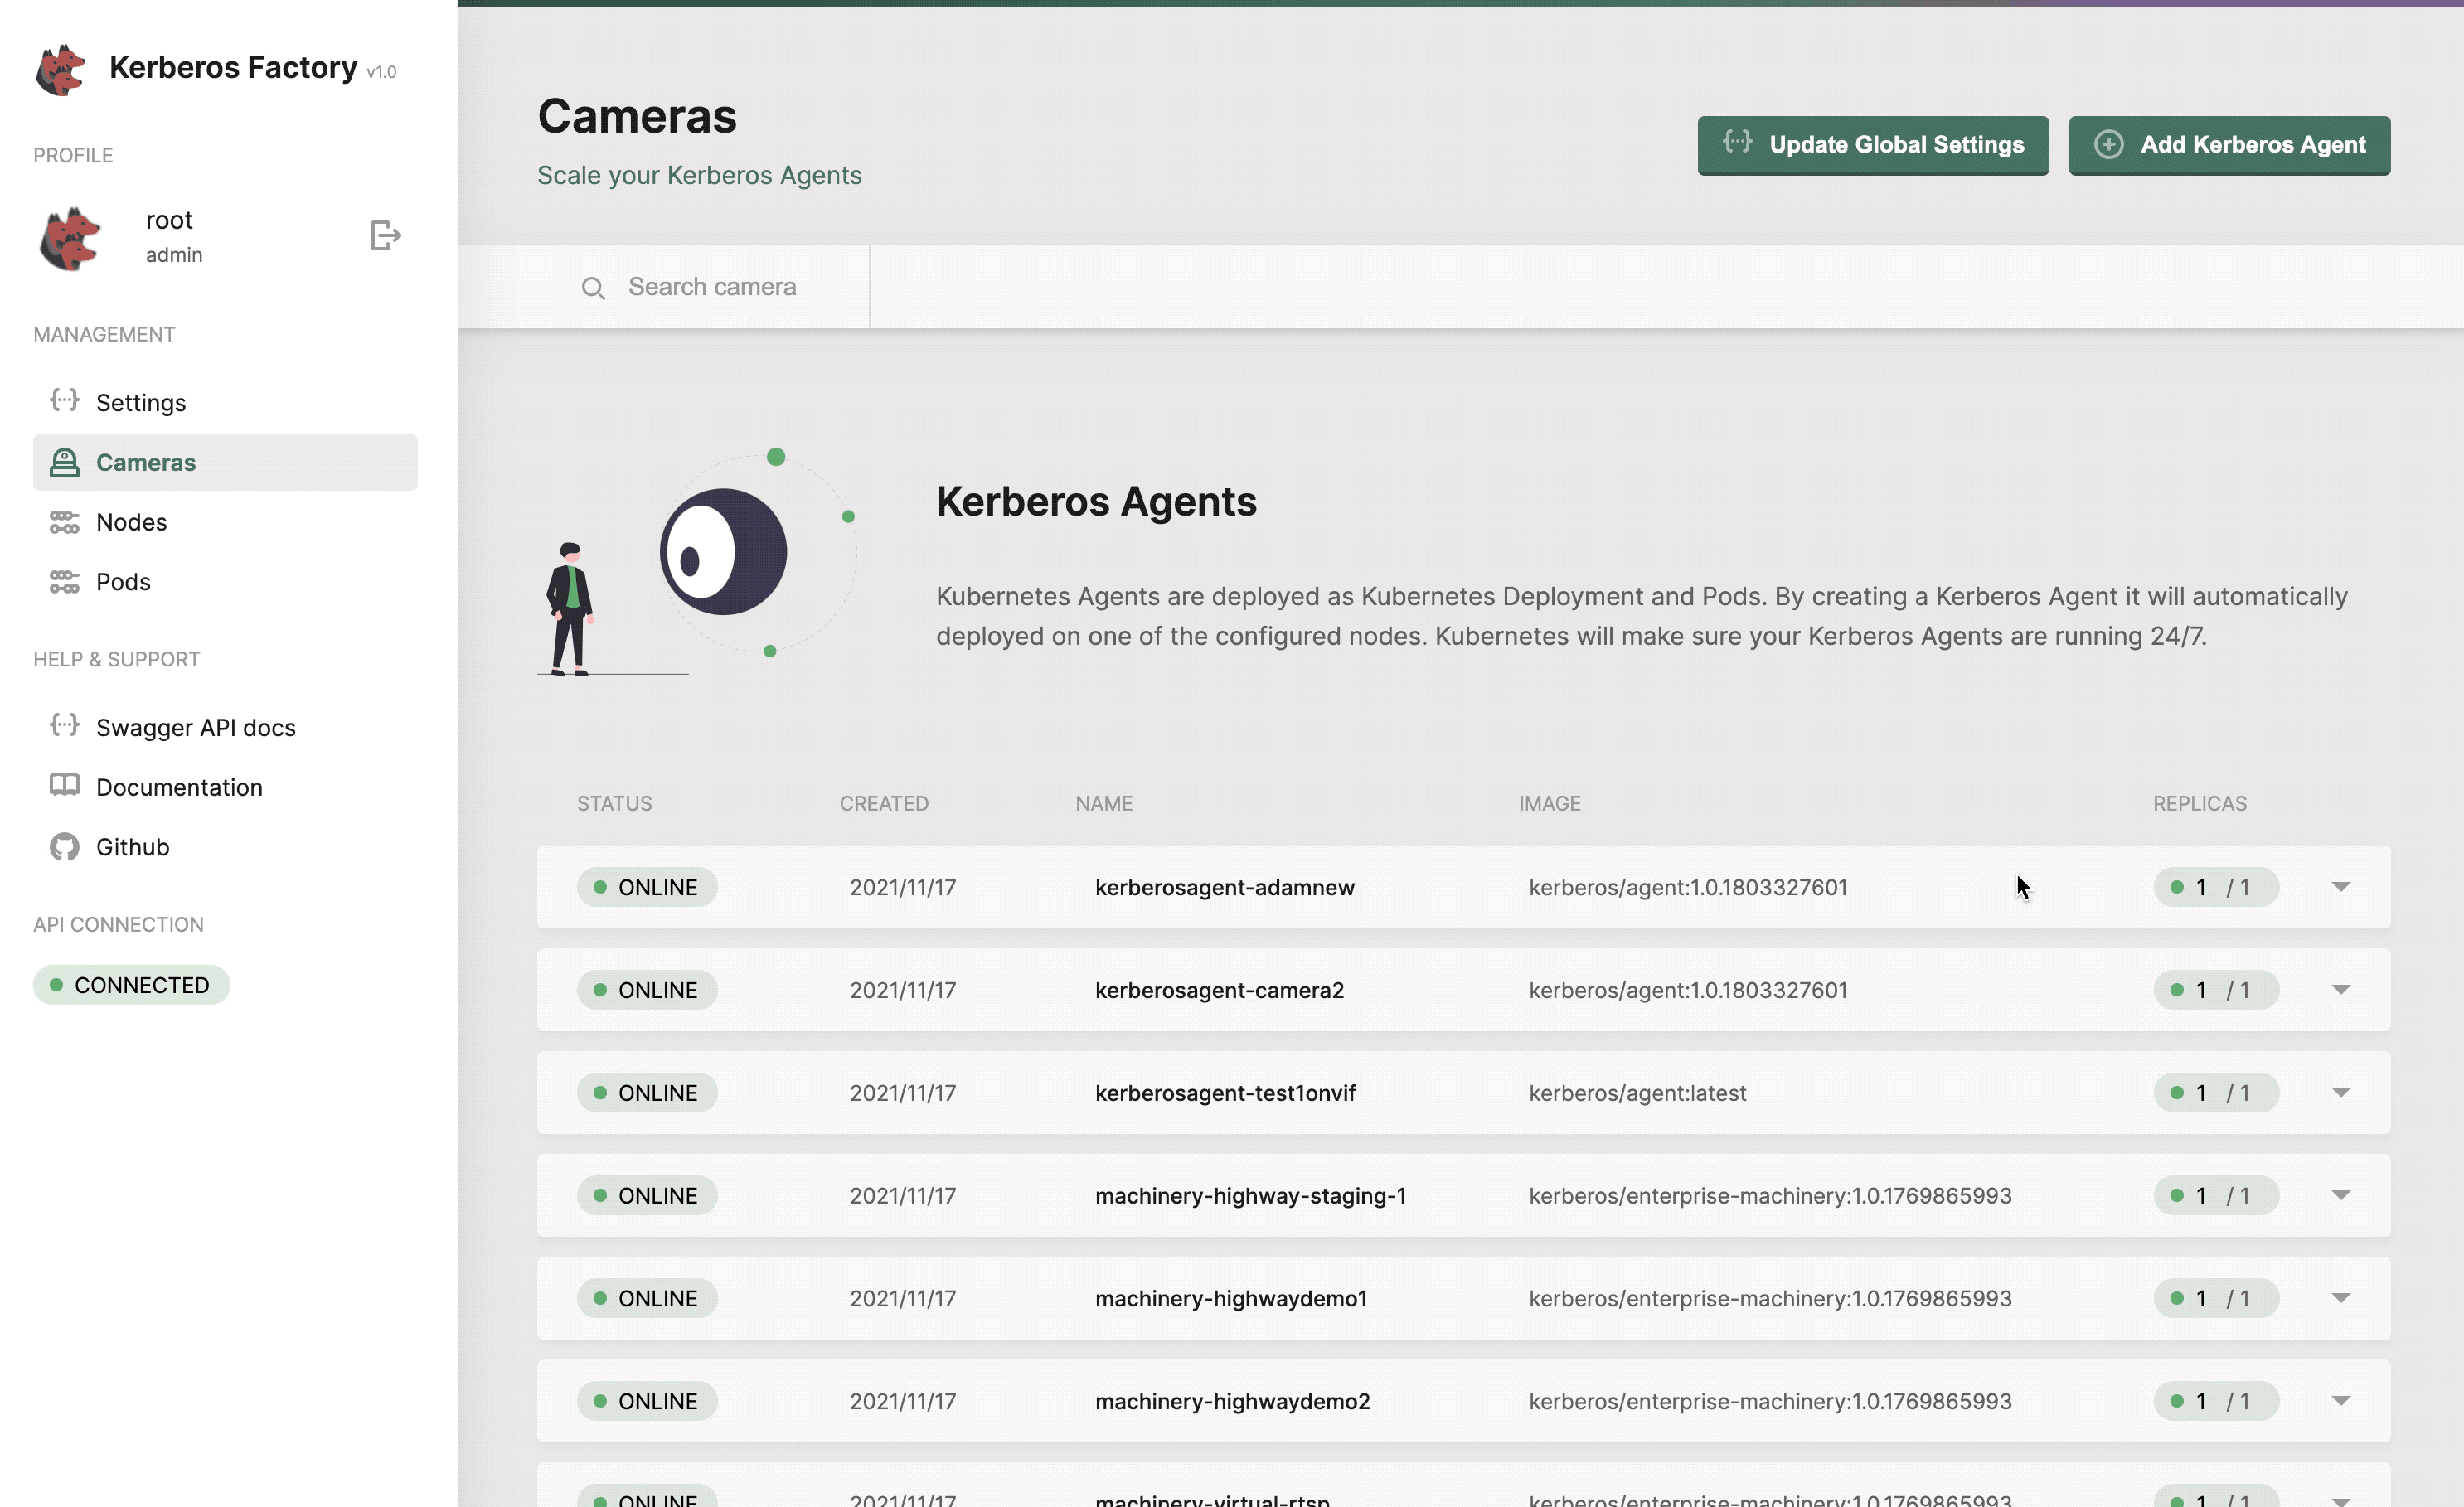
Review your Docker or Kubernetes agents.
On the left menu you will find pages are available:
- Settings: the global settings which are inherited by Kerberos Agents.
- Camera: a list of all the Kerberos Agents running in your cluster.
- Nodes: a list of all the nodes in your cluster.
- Pods: all the pods running in your cluster.
Nodes
The nodes section lists all the available nodes inside your Kubernetes cluster. It shows a limited amount of information such as the version, the number of Docker images installed on the node, and some basic hardware information.
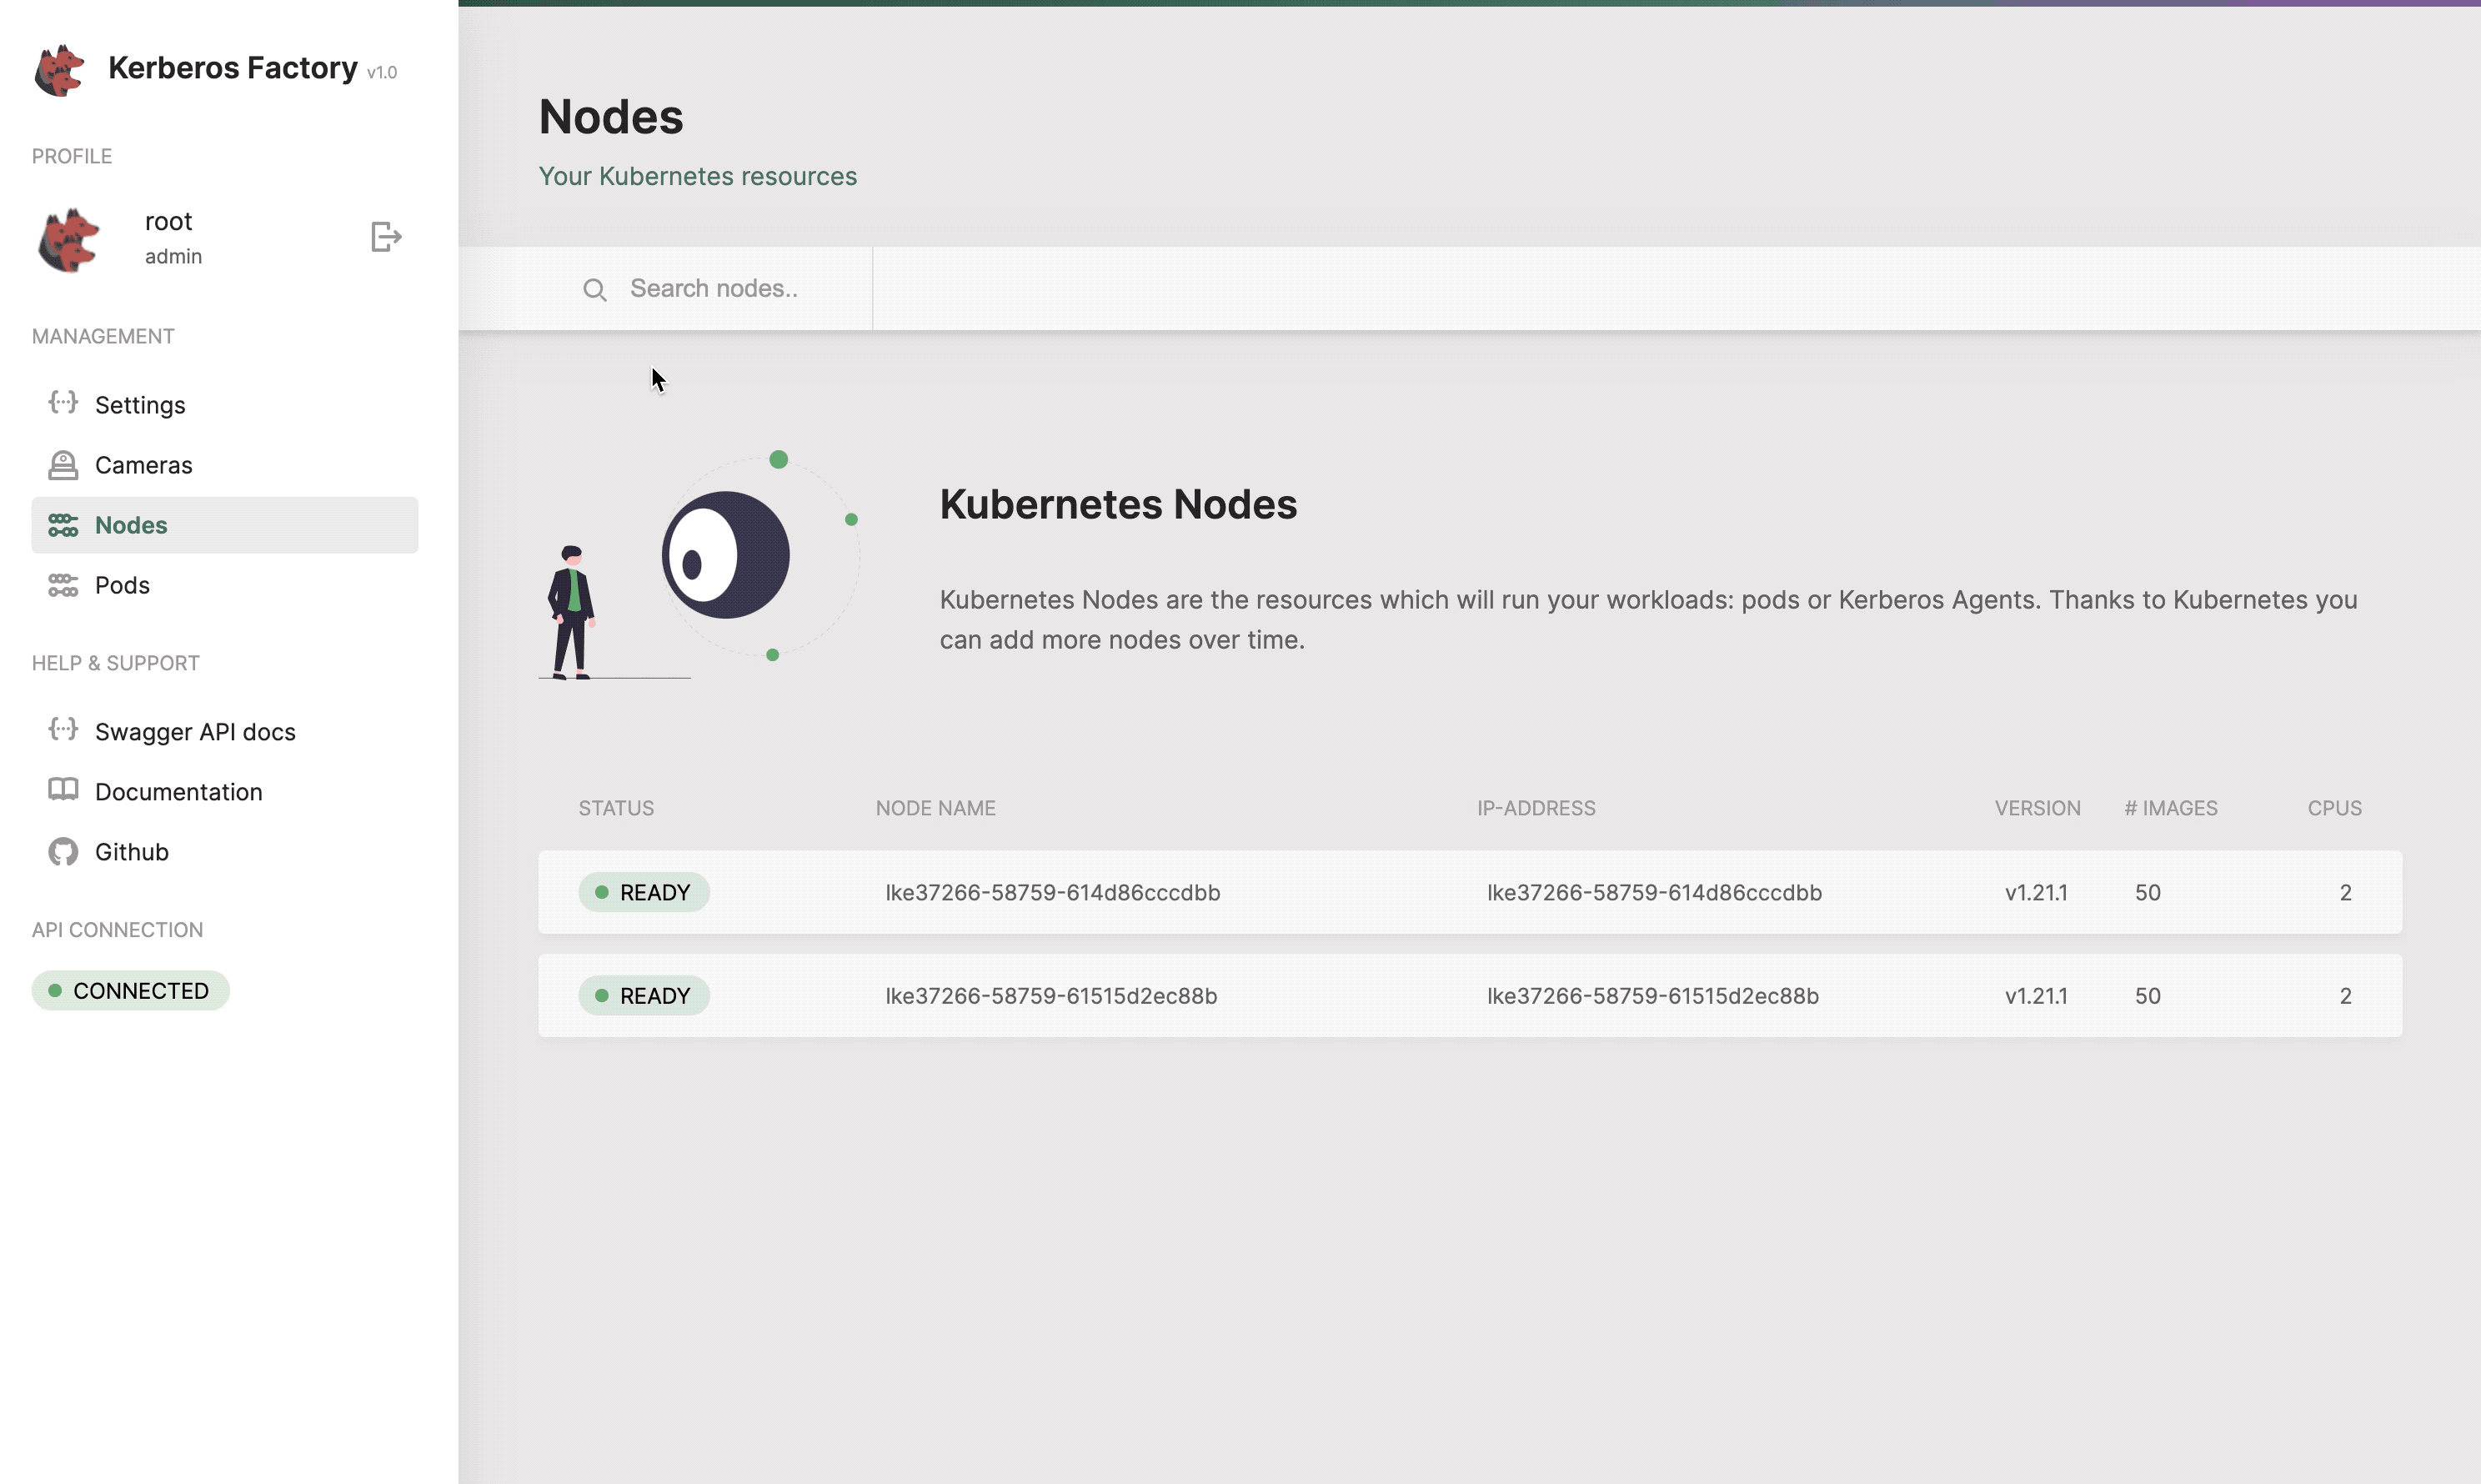
Get an entire list of nodes which are connected to your Kubernetes cluster.
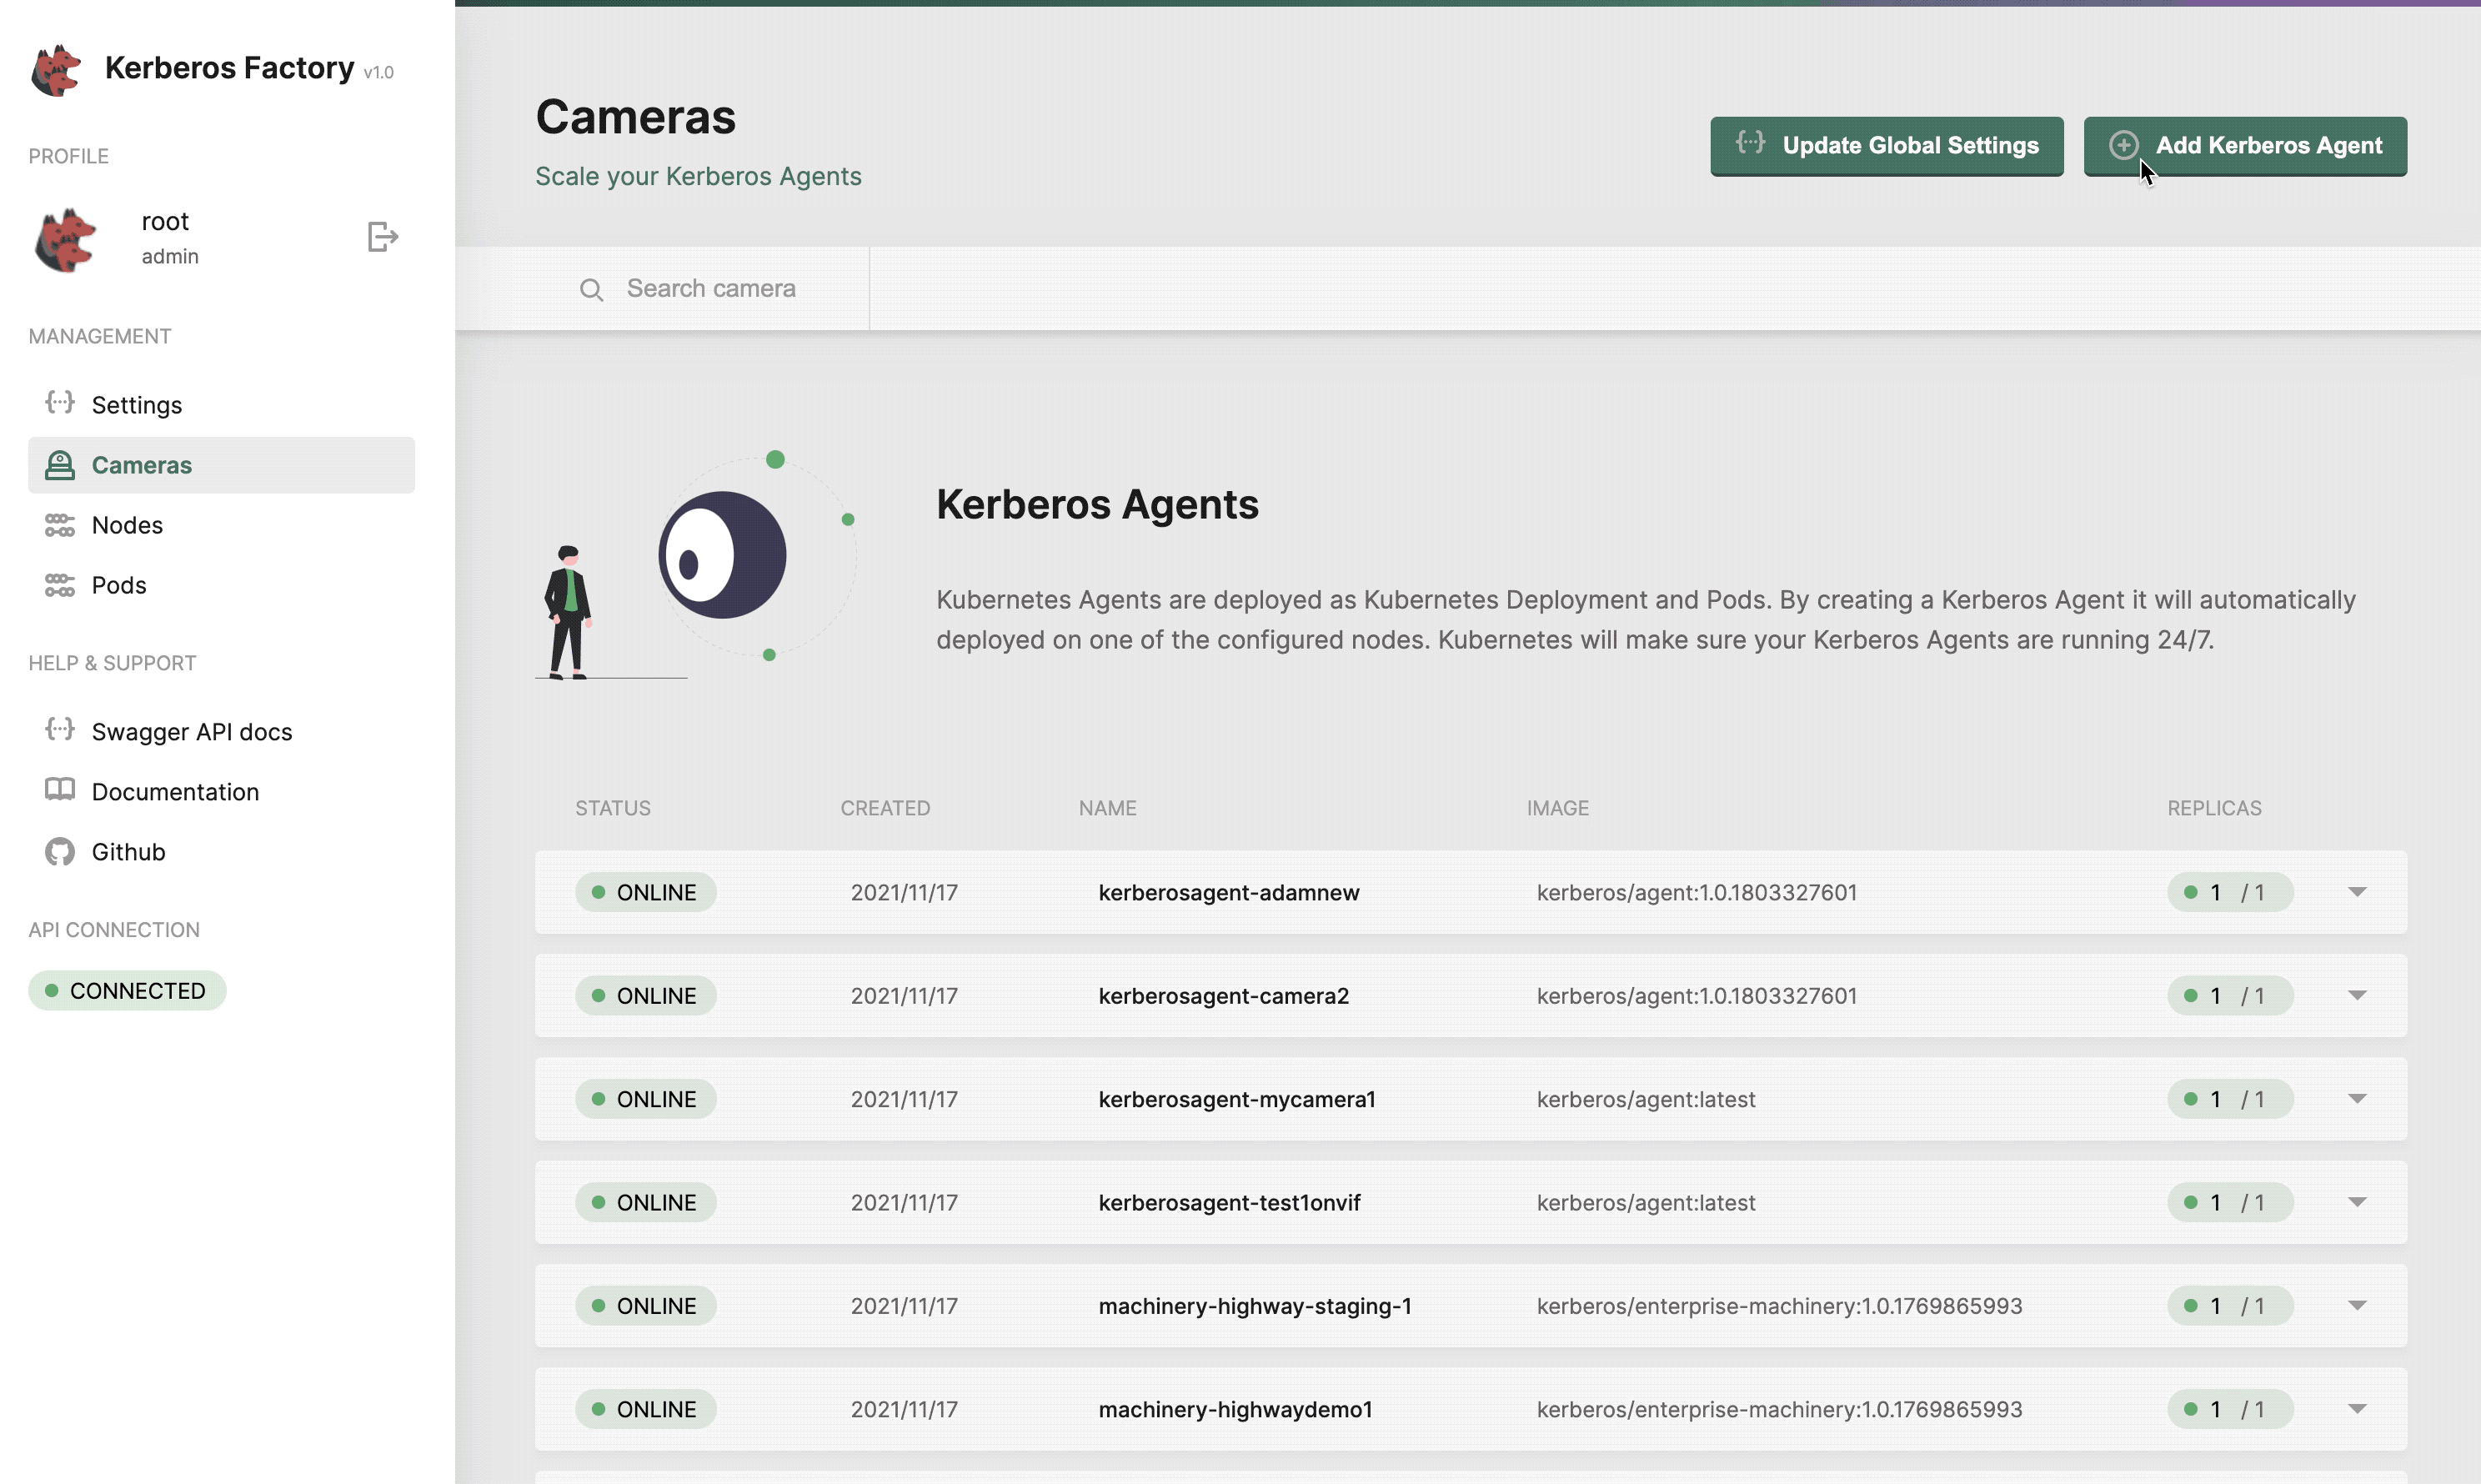
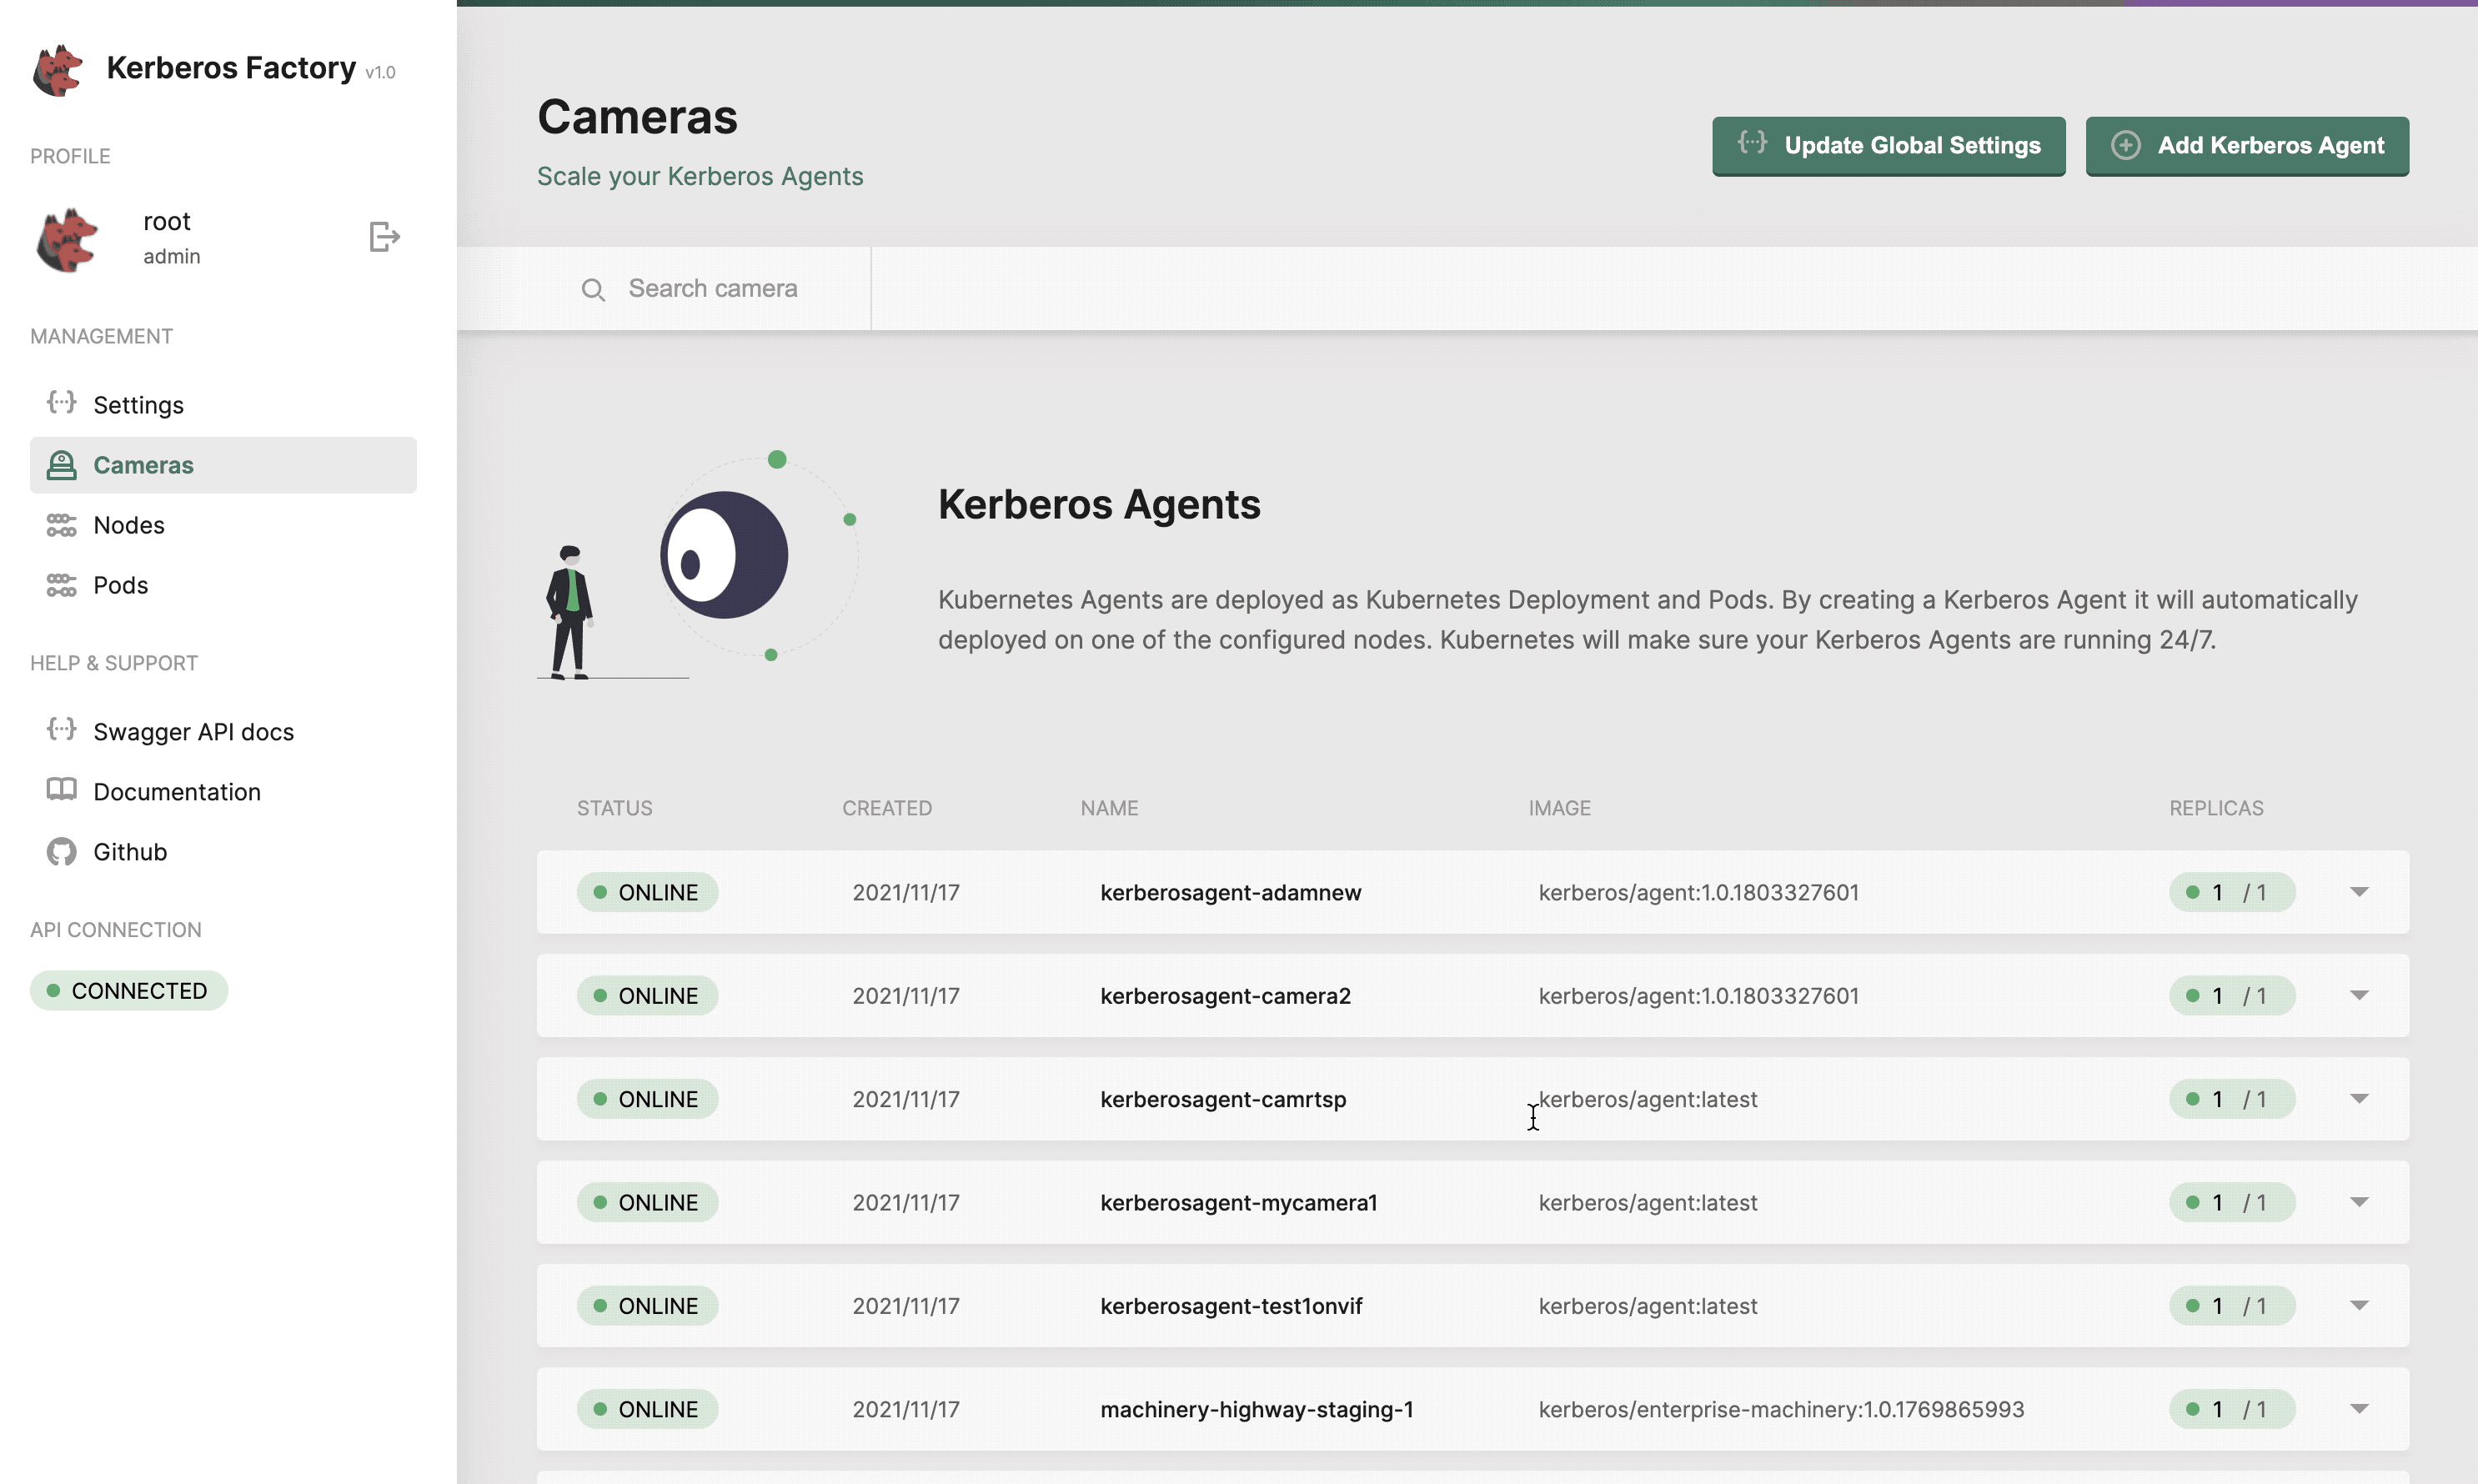
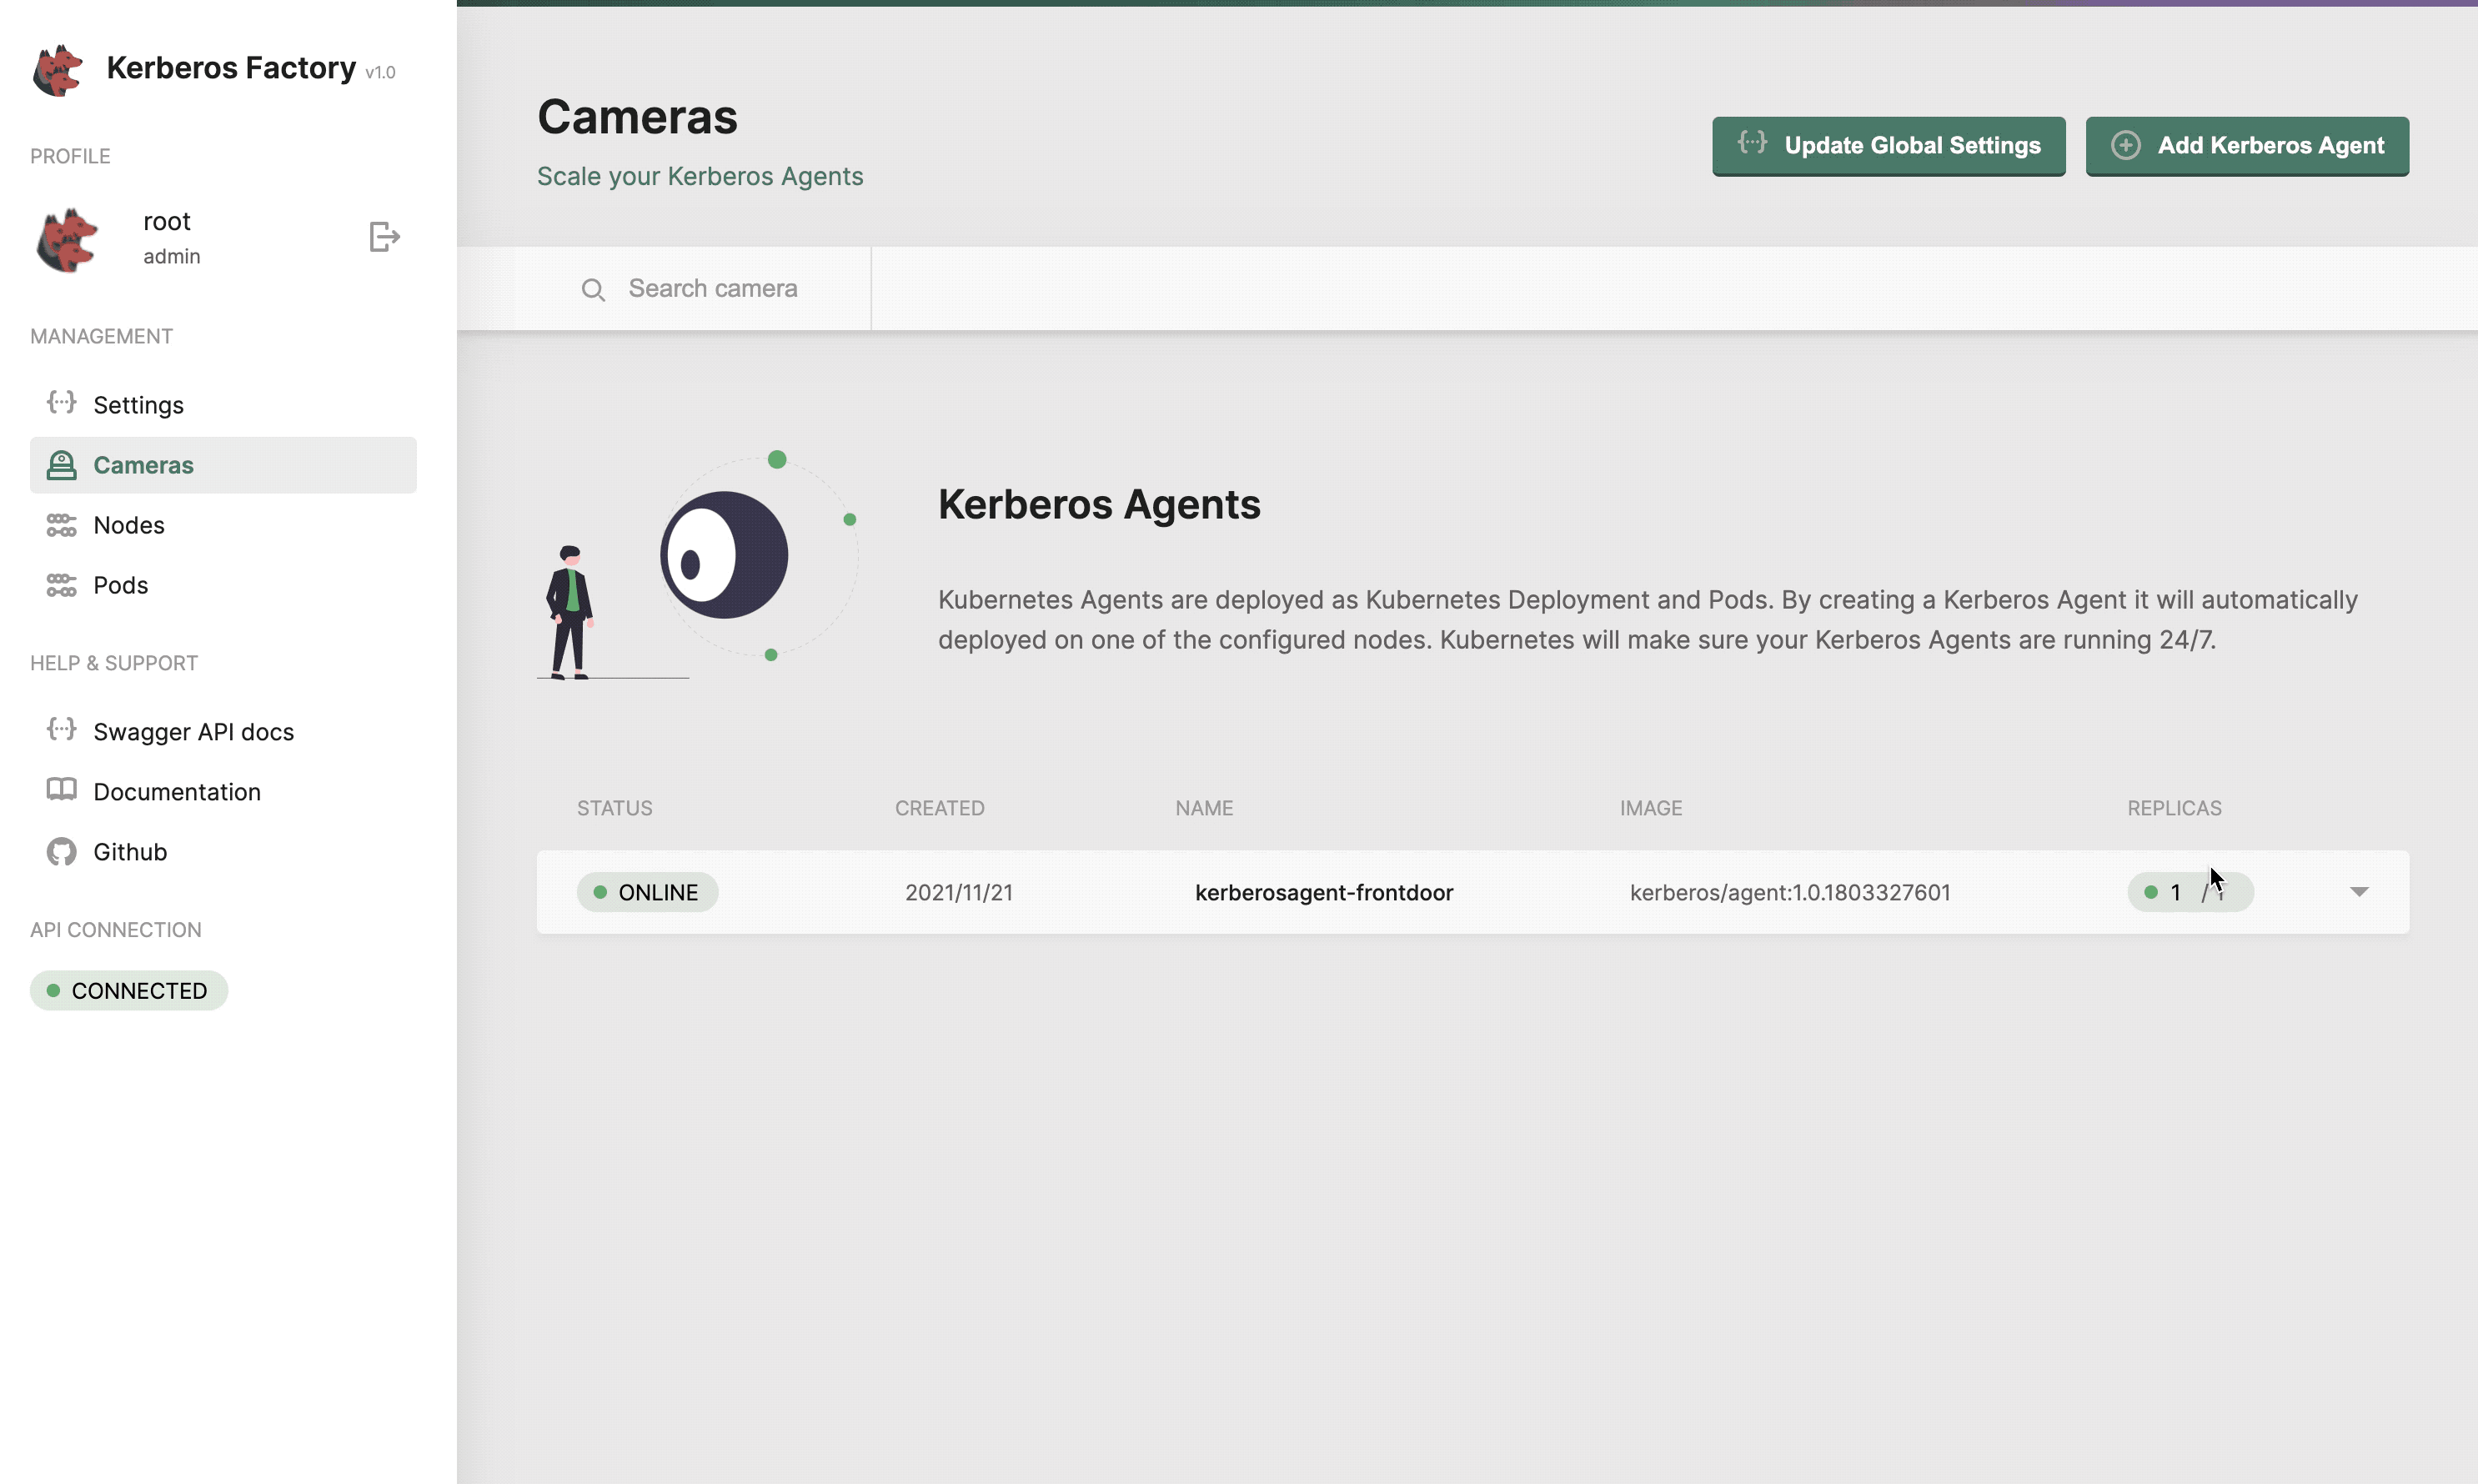
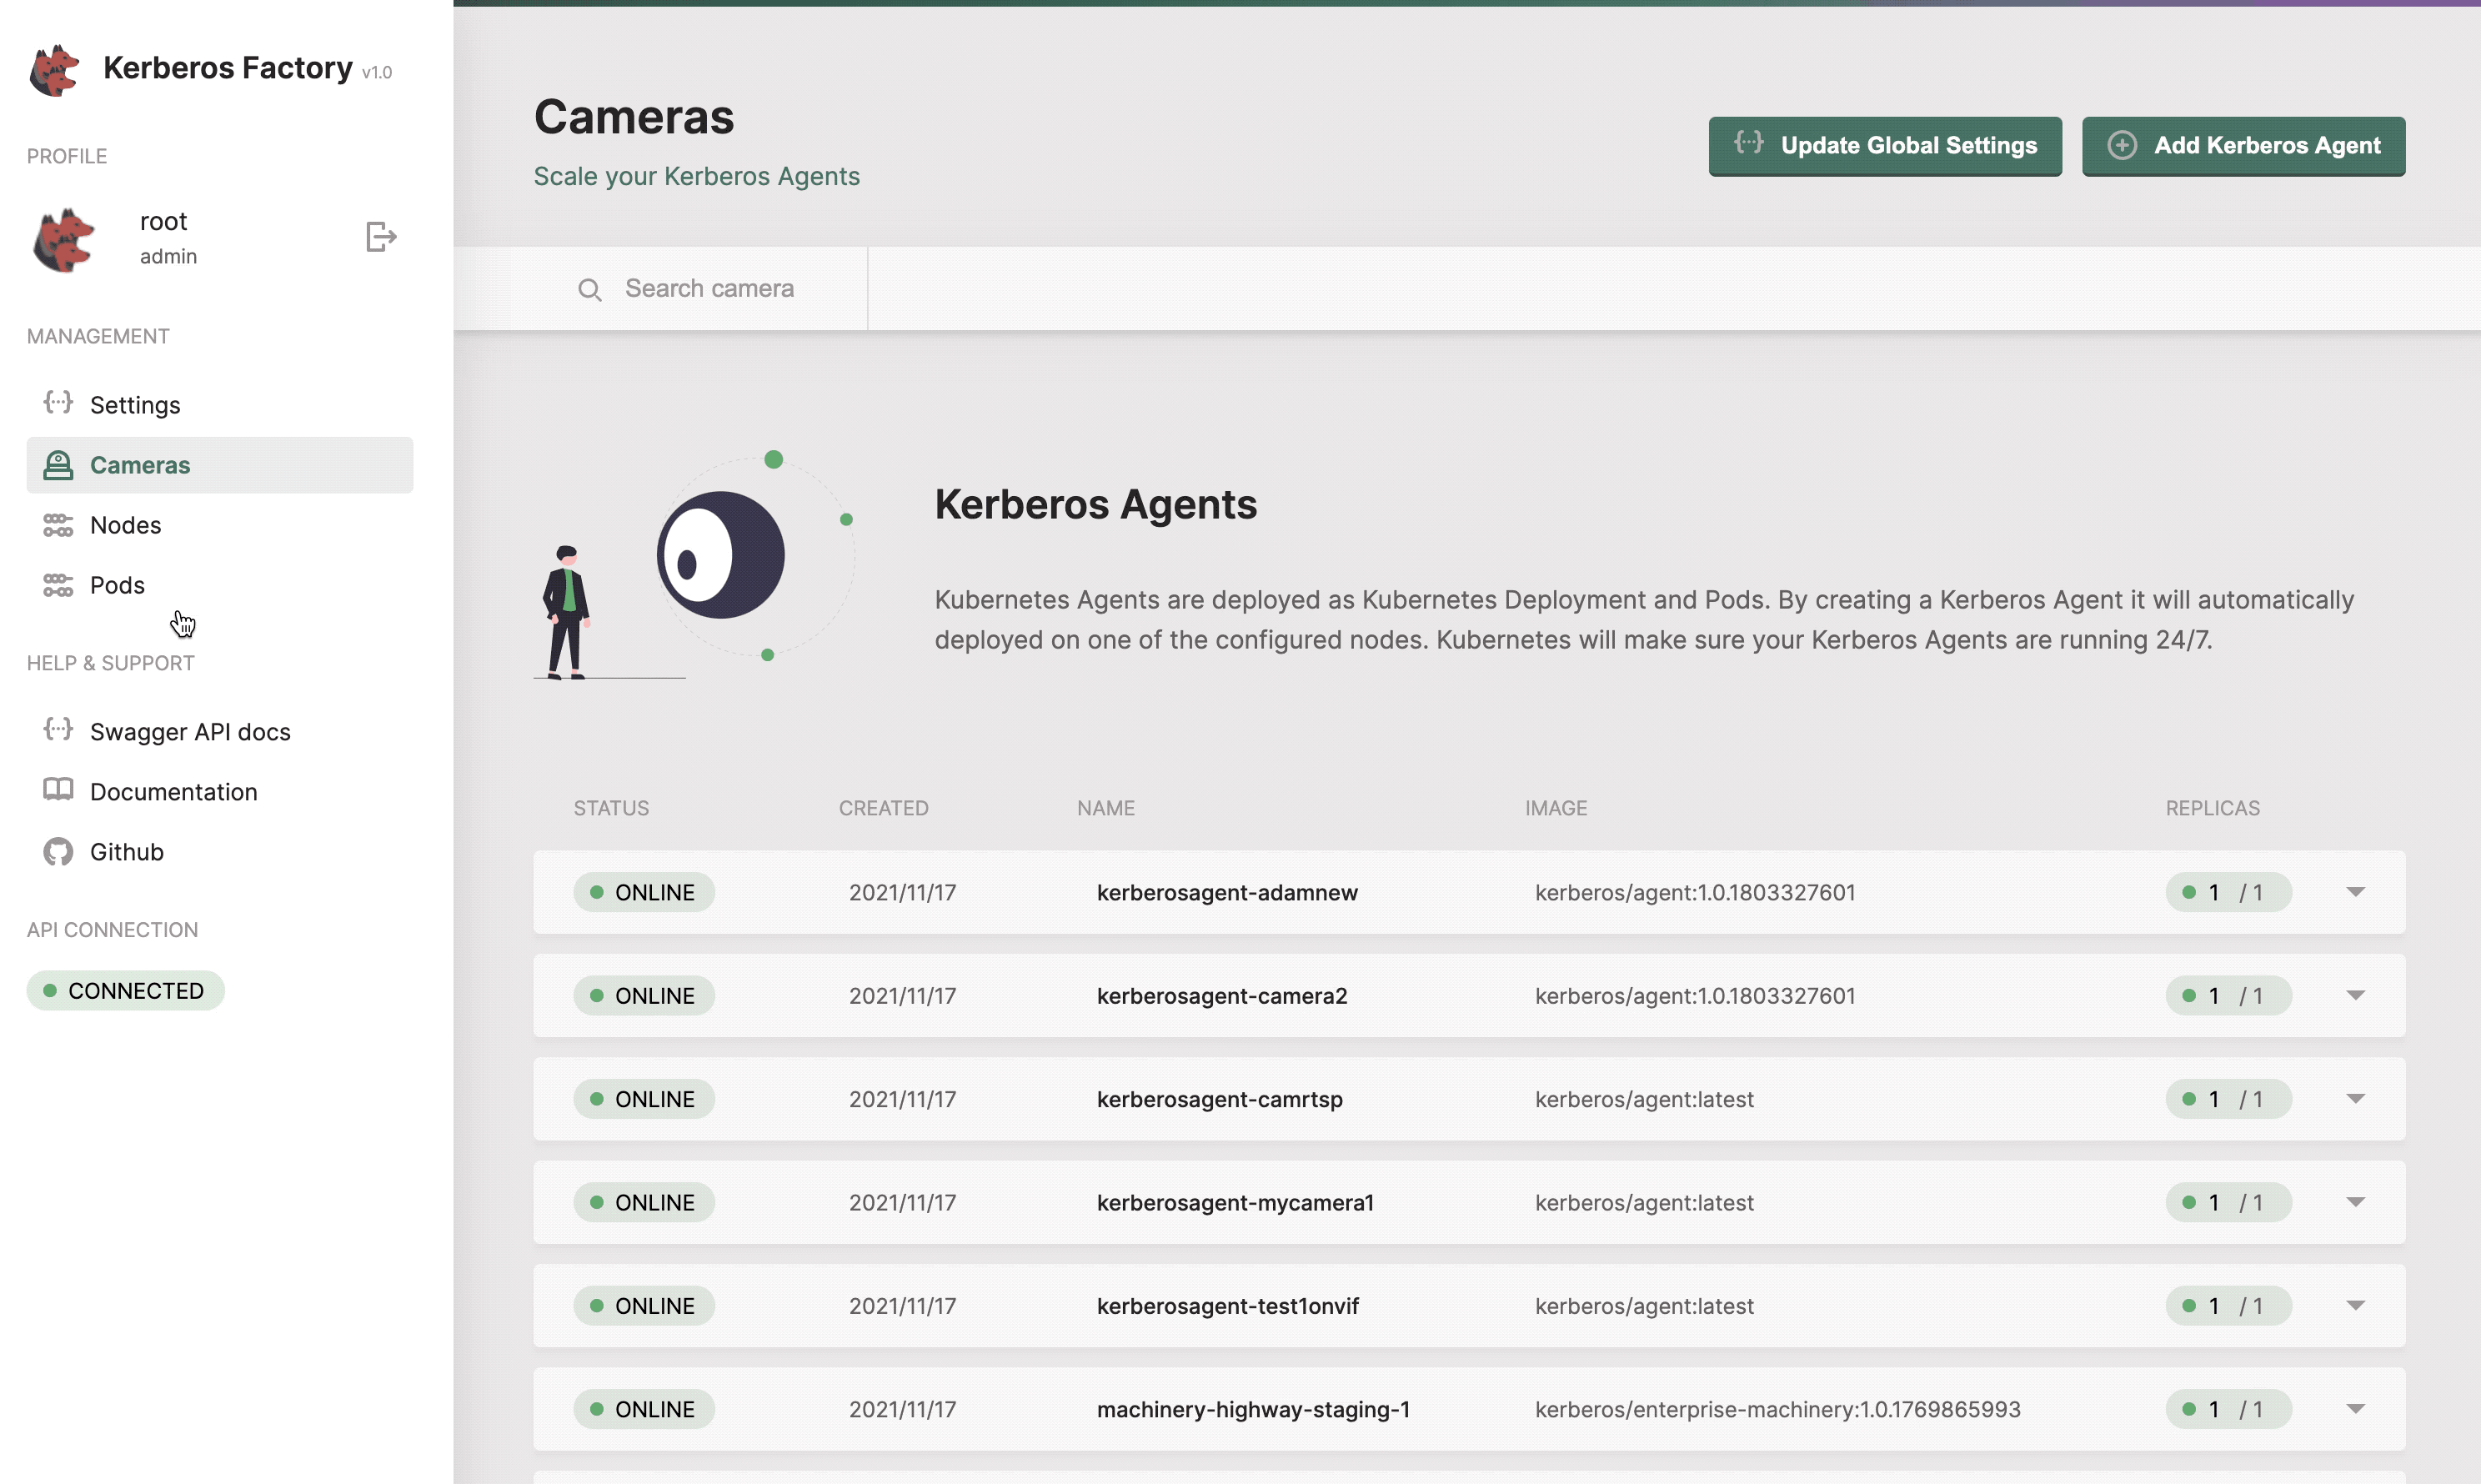
Cameras
The cameras section will list all the Kerberos Agents (running as deployments) that you have deployed inside your cluster. This page gives you access to deploy new Kerberos Agents. Next to that you can easily upgrade Kerberos Agents to a newer version, reboot them, view logging and update the configuration options of the Kerberos Agent.
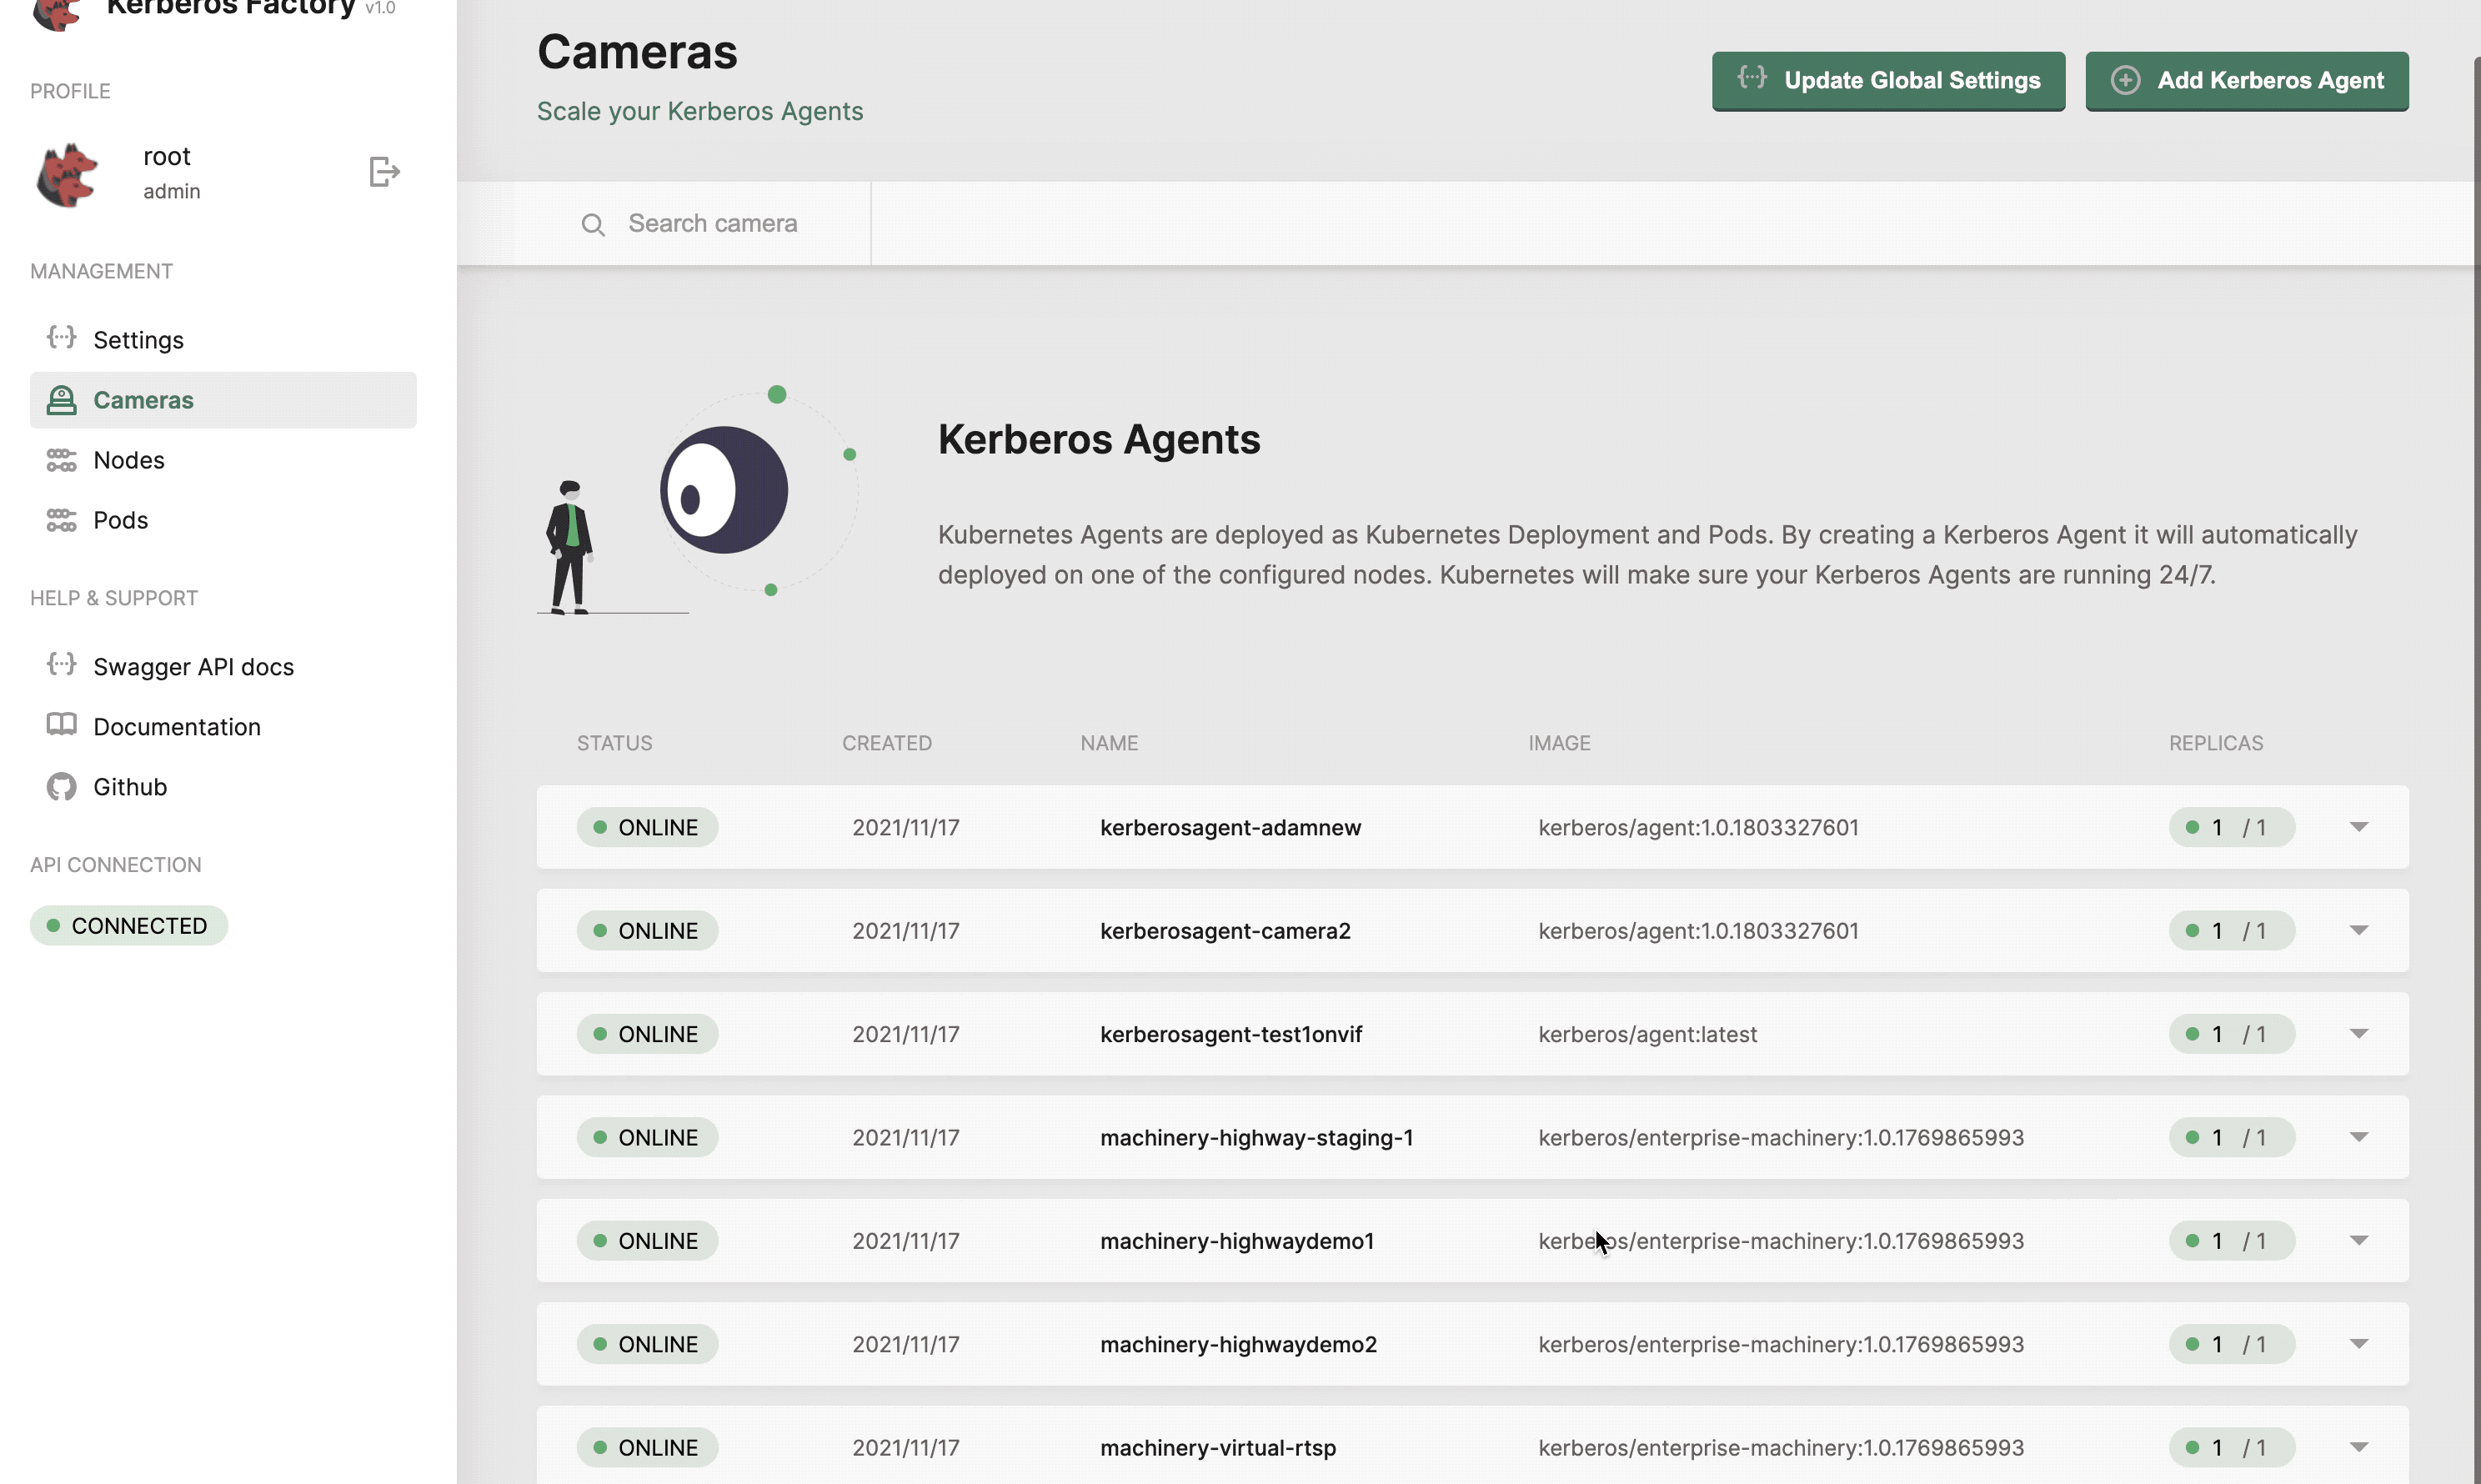
Get a list of all your Kerberos Agents.
Adding a new deployment
By specifying a name for your Kerberos Agent, and it’s corresponding RTSP url, a new Kubernetes deployment will be created for you, and a Kubernetes pod will be deployed to one of your installed nodes.
Deploy a single Kerberos Agent or in bulk.
Adding through ONVIF
Instead of creating a new Kerberos Agent through a RTSP stream, you can discover streams through ONVIF, and enable additional features through ONVIF such as PTZ. Enable the ONVIF toggle, and type in the IP address, ONVIF username and ONVIF password. Click the verify connection, and select an RTSP stream from the profile list.
Deploy a Kerberos Agent with ONVIF capabilities.
Once the Kerberos Agent is added, PTZ and other ONVIF capabilities will be enabled through Kerberos Hub.
Moving a camera through ONVIF PTZ.
Configuring a deployment
Once you have a running Kerberos Agent, you should see a green circle next to the deployment, indicating that it is successfully running. At any time you can configure your Kerberos Agent by clicking on the
Once you created the Kerberos Agent, you can configure the agent.
Following settings can be changed:
- One or more regions of interest,
- Time based conditions,
- Pre- and post recording
- Continuous recording
- Linking to Kerberos Hub Saas or Kerberos Vault
Global configuration
Configuration can be specified in a Kerberos Agent, this means that you update the configuration of a specific Kubernetes deployment. However, this can also be specified at a higher level. This higher level is what we call the global configuration.
By specifying configurations at a higher level, any Kerberos Agents will inherit from that configuration. This is improving the overall maintenance and management of your Kerberos Agents.

You can specify the configurations on a global level, so all Kerberos Agents will inherit from that.
Upgrade or reboot a Kerberos Agent
At Kerberos, we have agile development cycles, which means that new versions will be released every day, week or month. To make sure you can upgrade or downgrade these Kerberos Agent easily, an upgrade feature is built-in. When pressing the upgrade button, you will be able to select the version to which you would like to upgrade or downgrade. Once submitted, a zero downtime upgrade will take place. Kubernetes will download the new release, create a new pod, and destroy the old one.
At any moment you can reboot one of your Kerberos Agents. When pressing the reboot button, next to your deployment, Kubernetes will destroy the pod of your deployment, and schedule a new one.
You can specify the configurations on a global level, so all agents will inherit from that.
Pods
When creating a Kerberos Agent, Kubernetes will create a Kubernetes deployment and schedule a pod. The pod will be managed by your deployment, and deployed as a container to one of your available nodes. Once a pod dies/ crashes, or whatever unexpected scenario, the deployment will make sure it is deployed again to a different (or the same) node. This makes sure the Kerberos Agent is in a healthy state at all times.
When creating a deployment, a Kubernetes pod has created and assigned to a node.
Storage and video management
Kerberos Factory allows you to scale your video landscape horizontally, using the concept of Kubernetes, and brings a strong backbone for stability and performance. It allows you to avoid reinventing the wheel, and get stuck in the numerous challenges of developing a scalable video platform.
Kerberos Agents store their recordings locally for a short period. This means that long-term storage is not included in the solution. On top of that it also does not have a visual component, which allows you te review dashboards or recordings. To overcome these two challenges, long-term storage with extensibility/integration capabilities and visualisation features, following solutions were developed Kerberos Vault and Kerberos Hub.
Kerberos Vault
Kerberos Vault is a solution which makes it possible to store recordings from Kerberos Agents (across different clusters) at a central place, on the storage provider you want. You can store your recordings in the cloud (AWS S3, Google Cloud Storage, Azure Blob storage) or at the edge (Minio, Ceph).
On the other hand it’s an open platform, as it allows you build extensions and integrations (web apps, mobile apps, machine learning services much more). Kerberos Vault ships with the ability of real-time messaging (Kafka), and a REST API (documented as Swagger).

Kerberos Vault allows you to centralise your recordings and build integrations.
To connect one or more Kerberos Agents to your Kerberos Vault instance, you should open the configuration option and navigate to the cloud tab. After selected you need to fill-in the credentials from your Kerberos Vault account.
To connect one or more Kerberos Agents to your Kerberos Vault instance, you should open the configuration option and navigate to the cloud tab. After selected you need to fill-in the credentials from your Kerberos Vault account.
Kerberos Vault URI: this is the API endpoint of your Kerberos Vault instance. Usually this is in the following format:
http(s)://yourdomain.com/api. Whereyourdomain.comshould match your Kerberos Vault endpoint. If you are deploying Kerberos Vault at the edge, in the same cluster, you can use the internal DNS name, as followinghttp://vault.kerberos-vault/api. Wherevaultis theservice nameandkerberos-vaultis thenamespace.Provider: the name of the provider, which you created on the Kerberos Vault providers page, to which you want to send your recordings to.
Directory: this is the subdirectory in which your files will be stored. At the time of writing this should also equal your Kerberos Hub username, if you plan to upload to Kerberos Hub.
Access Key: this should match the access key of one of your Kerberos Vault accounts.
Secret Key: this should match the secret key of one of your Kerberos Vault accounts.

Using Kerberos Vault you can bring your own storage, and store the recordings of your agents in your own storage provider.
Kerberos Hub
For the visualisation part Kerberos Hub comes into the picture. Kerberos Hub is a web app, backed up with a number of microservices, that shows dashboards, live streams, filter recordings and much more. Learn more about the features and functions here.
You have two choices when using Kerberos Hub, either you send your recordings from your Kerberos Agents directly to Kerberos Hub, or you send your recordings to Kerberos Vault, and connect Kerberos Vault to Kerberos Hub. About the latter more is explained on the Kerberos Vault page.
Select the Kerberos Hub option, and copy-paste the credentials from your Kerberos Hub subscription.
By linking your Enterprise agent to Kerberos Hub, your recordings and livestreams will become available online.
Proxy URI: this is a proxy service which moves the recording in the Kerberos Hub SAAS version. By default
http://proxy.kerberos.io.Region: this is the region where your recordings will be stored. Only
eu-west-1for now (will change, on the roadmap).Bucket: the name of the Kerberos Hub bucket. Only
kerberosacceptfor now (will change, on the roadmap).Directory: this is your personal directory, and matches your Kerberos Hub username.
In the Kerberos Hub section (next to persistence) provide following information
API url: the url of the Kerberos Hub endpoint. By default
https://api.cloud.kerberos.iofor our Kerberos Hub SAAS version.Public Key: this should match the public key of your Kerberos Hub subscription.
Private Key: this should match the private key of your Kerberos Hub subscription.